This isn't a recipe, a workout, or an exercise in building confidence but it's something that I want to share. Every day I make a gratitude list. It's really simple and only takes me a couple minutes but it helps me to keep things in perspective. It forces me to take a step back of whatever may be going on that day, good or bad, and reflect on what I have to be grateful. It can be the smallest thing like something good that happened that day or to a much larger scale like my mom's recovery. The point is that there aren't any specific rules or qualifications to make the list, just something that you are grateful for. Three things is all you have to put on the list, the first three that come to mind. Each day, though, you have to come up with something different so that's where the challenge lies!
I feel like it's so easy to take things for granted and I know I'm at fault for doing that every day. But I'm trying to change that and even though I know it'll probably never be perfect, I can already tell that my thought process is different. I have a reminder set on my phone for 9am each day to make my list. In fact, I've been doing this ever since May 2013 when my mom had her brain aneurysm. At that time so many bad things were happening that I needed to start focusing on the good as well for my sanity and well-being. I was so stressed and on edge that I needed something hopeful to cling to, some bright spot on the horizon. Making a gratitude list helped me to see that even in the midst of the most difficult time in my life, I was still blessed. God had never abandoned me or my family and He never will. Making lists reminds me of that fact.
It doesn't have to be during a difficult time because I find that making my list for the day is just as effective as when going through the good times. Either way it allows me to see the good in my life regardless of what I may be going through. I think it's an important exercise and good for both my attitude and perspective. Because at the end of the day I realize not to sweat the small stuff because in the big picture, life is good!
Here's an example of my list that I wrote this morning:
1. I'm not anxious this summer to wear a bikini at the beach
2. My mom was able to stay alone by herself all day yesterday
3. Get to leave for vacation on Saturday!
Thursday, June 26, 2014
Tuesday, June 24, 2014
Pb2 Yogurt Dip
I'm sure plenty of you know about and have tried the craze with peanut butter and greek yogurt. I've spent a good bit of time perfecting the ratios to my taste and I'm happy to say I'm ready to share the final product! I discovered that pb2 and agave work better than peanut butter and honey by making the dip smoother and it all incorporates better. I know some recipes call for cinnamon but I tried adding it once and I wanted to gag. I would not recommend adding cinnamon unless you've had it before in this recipe and know you like it. Otherwise, it just throws the taste off for me for some reason.
Okay so you only need three simple ingredients: pb2, plain greek yogurt, and agave! You can always use honey but I've found that the agave stirs in better and doesn't leave clumps like the honey does. Plus I just really love the taste of agave!
The ratio I've found is 3:1 meaning you need 3 tablespoons of greek yogurt for every 1 tablespoon of pb2. That way if you need to make this in larger batches it's easier because you don't have to worry about breaking down the recipe to weird fractions. In fact, that's why I looked into ratios rather than trying to figure out measurements of the ingredients because I'm awful when it comes to figuring out how to multiply or divide a recipe. Now when I go to make it I just remember it's a 3:1 ratio and don't have to worry about memorizing a recipe! I add the agave to taste until it's sweet enough for me. It's probably along the lines of 1 tsp or so but I just drizzle it in until I'm happy with the taste.
My favorite way to eat this dip is with an apple. Of course, you can pair it with anything you really want like fruits, graham crackers, or even cookies.
For a single serving just mix 3 tbsp of greek yogurt (plain or vanilla) with 1 tbsp of pb2 and about 1-2 tsp of agave (or honey). Enjoy!
***Nutritional Information*** (for single serving)
47 calories, 4g carbs, 7g protein, 1g fat
Monday, June 23, 2014
Vanilla Bean Doughnuts with a Healthy Twist!
This post is a little late but on National Doughnut Day I figured that eating a doughnut was a must, right? Well awhile back I bought a doughnut pan because I thought for some reason I would be making doughnuts by the dozen. Except I didn't (no surprise) but that impulsive decision paid off when I wanted doughnuts to properly celebrate National Doughnut Day! Why haven't I heard of this day before? Doughnut anything and I'm pretty much on board!
So it was on to Pinterest to hunt down the perfect recipe. I didn't know what all I had on hand that would work so I figured it was best to stick to a simple and safe recipe. Which lead me to vanilla bean doughnuts with a glaze! Sounded good to me so I checked out the ingredients and wasn't 100% happy so I figured I would try a couple swaps to improve the "healthiness". This was partially due to the fact that I didn't have buttermilk on hand which I don't think I ever do unless I know it's absolutely necessary in a recipe I'll be making. Otherwise I can do without it and swap in almond milk. So these doughnuts aren't completely healthy but it was a doughnut holiday and we all deserve a treat every now and then, am I right??
Like I said they're not 100% healthy but I still enjoyed two without any guilt! After all it was Friday and I had worked hard all week so it was okay to give myself a small treat. Fridays are usually my treat days so these doughnuts fit in perfectly! I try to stick to about 80-20 in terms of clean eating and no longer have any problems with allowing myself something that isn't "healthy". It's all about moderation.
The healthy twist for this recipe was that I traded the buttermilk for almond milk and subbed 2/3 of the white sugar with stevia. I kept some of the white sugar to help with the baking. I was thinking of doing away with the butter and trying out greek yogurt but I really wanted doughnuts and wanted to make sure I would get this recipe right on the first try! Maybe in the future I'll work on tweaking it.
Okay here's what you'll need for the doughnuts: (makes 6)
1 cup unbleached flour
1/4 tsp cinnamon
2 tbsp sugar
4 tbsp stevia
1 tsp baking powder
6 tbsp unsweetened almond milk
1 egg
1/2 tsp vanilla
1 tbsp butter, melted

1. Preheat the oven to 325 and grease the doughnut pan with non-stick spray
2. Mix together the flour, sugar, baking powder, and cinnamon

3. Add the almond milk, butter, vanilla, and egg
4. Pour the batter into the pan. The recipe I found said to use a piping bag but nobody ain't got time for that so I just used a spoon and did my best to keep it tidy

5. Bake 8-11 minutes. For my oven I think I was closer to 11 minutes but that can vary between appliances. I had no idea what it meant for the dough to be "springy" but I quickly figured it out. When I first checked the doughnuts at around 8 minutes by gently poking one, it sunk in like a cave and just stayed there. After a couple minutes though when I poked it again, the dough didn't cave but reformed itself once my finger came away. If you can't tell already I'm not the most experienced baker so I like to share any little bits of information like this for anyone else who might be new too!
6. Allow the doughnuts to cool for a few minutes as you prepare the glaze.

So for the glaze:
1/3 cup + 2 tbsp powdered sugar
1 tsp vanilla extract
2 tsp almond milk
1/4 tsp cinnamon
- Mix together the ingredients. Start out with only 1/2 tsp of vanilla and 1 tsp of almond milk just so you don't make it too watery then add in however much you need to get the right consistency. The original recipe called for 1/2 cup powdered sugar and less extract but when I tasted it, it was like liquid sugar and wayyyy too sweet for my taste! It's totally fine if you can handle it but it was just too much for me. So I decreased it by a couple tablespoons, upped the extract, and added in a dash of cinnamon. For me it created more depth and didn't just taste like liquid powdered sugar. You might have to play around with it like I did to suit your own sweet tooth.
- Dip the doughnuts into the glaze and top with sprinkles!

Next time I make these I think I'll experiment with different toppings. I'm thinking about crushed candy bars, chocolate, nuts, or whatever I have on hand!
***Nutritional Information*** per doughnut with glaze
140 calories, 22g carbs, 3g protein, 0g fat
Recipe adapted from: Averie Cooks
So it was on to Pinterest to hunt down the perfect recipe. I didn't know what all I had on hand that would work so I figured it was best to stick to a simple and safe recipe. Which lead me to vanilla bean doughnuts with a glaze! Sounded good to me so I checked out the ingredients and wasn't 100% happy so I figured I would try a couple swaps to improve the "healthiness". This was partially due to the fact that I didn't have buttermilk on hand which I don't think I ever do unless I know it's absolutely necessary in a recipe I'll be making. Otherwise I can do without it and swap in almond milk. So these doughnuts aren't completely healthy but it was a doughnut holiday and we all deserve a treat every now and then, am I right??
Like I said they're not 100% healthy but I still enjoyed two without any guilt! After all it was Friday and I had worked hard all week so it was okay to give myself a small treat. Fridays are usually my treat days so these doughnuts fit in perfectly! I try to stick to about 80-20 in terms of clean eating and no longer have any problems with allowing myself something that isn't "healthy". It's all about moderation.
The healthy twist for this recipe was that I traded the buttermilk for almond milk and subbed 2/3 of the white sugar with stevia. I kept some of the white sugar to help with the baking. I was thinking of doing away with the butter and trying out greek yogurt but I really wanted doughnuts and wanted to make sure I would get this recipe right on the first try! Maybe in the future I'll work on tweaking it.
Okay here's what you'll need for the doughnuts: (makes 6)
1 cup unbleached flour
1/4 tsp cinnamon
2 tbsp sugar
4 tbsp stevia
1 tsp baking powder
6 tbsp unsweetened almond milk
1 egg
1/2 tsp vanilla
1 tbsp butter, melted
1. Preheat the oven to 325 and grease the doughnut pan with non-stick spray
2. Mix together the flour, sugar, baking powder, and cinnamon
3. Add the almond milk, butter, vanilla, and egg
4. Pour the batter into the pan. The recipe I found said to use a piping bag but nobody ain't got time for that so I just used a spoon and did my best to keep it tidy
6. Allow the doughnuts to cool for a few minutes as you prepare the glaze.
So for the glaze:
1/3 cup + 2 tbsp powdered sugar
1 tsp vanilla extract
2 tsp almond milk
1/4 tsp cinnamon
- Mix together the ingredients. Start out with only 1/2 tsp of vanilla and 1 tsp of almond milk just so you don't make it too watery then add in however much you need to get the right consistency. The original recipe called for 1/2 cup powdered sugar and less extract but when I tasted it, it was like liquid sugar and wayyyy too sweet for my taste! It's totally fine if you can handle it but it was just too much for me. So I decreased it by a couple tablespoons, upped the extract, and added in a dash of cinnamon. For me it created more depth and didn't just taste like liquid powdered sugar. You might have to play around with it like I did to suit your own sweet tooth.
- Dip the doughnuts into the glaze and top with sprinkles!
Next time I make these I think I'll experiment with different toppings. I'm thinking about crushed candy bars, chocolate, nuts, or whatever I have on hand!
***Nutritional Information*** per doughnut with glaze
140 calories, 22g carbs, 3g protein, 0g fat
Recipe adapted from: Averie Cooks
Friday, June 20, 2014
Changes at Summer Camp: Banning Body Talk?
I heard something interesting on the radio when I was driving home from work. Apparently, there's a summer camp that bans kids from talking about their bodies. At first I didn't understand exactly what they meant until it was further explained. Kids aren't allowed to talk about anything related to their body or other kids' bodies, not even clothes or hair. First I thought about how hard that would be because if I see something I like on someone or if they do something different with their hair or if they look nice, I compliment them. Then I thought that maybe banning this kind of talk wouldn't be a good thing because people like to hear compliments, right? And I like to give them because I think it's nice seeing the other person light up and smile when they hear it. I think it's important to build each other up and you never know but you could have just made their day! On the other hand, though, banning talk about each others' bodies also decreases a lot of chances for bullying. For me, that definitely outweighs the importance of giving or receiving a compliment, and I started to appreciate why the founders and counselors were enforcing this ban.
Naturally, I was more curious and wanted to find out more about this summer camp so I googled it and found the full article. The more I read and thought about it, the more I began to think it was a good idea. There's been really positive feedback both from the parents and kids at the summer camp, saying that kids feel free to dress however they like without worrying about what other kids will say. In short: they feel free to be themselves. Exactly how they are aside from their looks, clothes, hair, or any other physical attributes. I think that's so wonderful and makes me hopeful that kids at this summer camp are learning to see each other for who they are rather what they look like. Isn't that a beautiful thought? In fact one parent reported that the conversations with her daughter (who is only 11!) have changed since she has been at this summer camp. According to the mother, they have more quality conversations that don't focus on clothes, hair, etc. but rather along the lines of life experiences. I think that's awesome!
Fortunately, I've never been the victim of harsh bullying. I was teased when I was younger for being short, which I still am, but it was never even close to the point that some kids have to deal with today. In fact, the boy who did it the most ended up being one of my best friends so he hardly did any major damage. It breaks my heart what some kids and teenagers have to deal with at school today so I'm glad to hear of a place where kids feel free to be themselves without fear of any kind of negative comments. The staff all work hard to create a "safe zone" for these kids that I have huge respect for what they're trying to do! There's a lack of bullying at the camp which they believe is linked to the no body talk rule, and I'd have to agree that there is most likely a strong correlation. I'm not saying this could solve bullying once and for all because that's a much more complex problem but it's a step in the right direction.
What I find most interesting is that kids also can't say anything about their own bodies which teaches them to see themselves further than skin deep. Ignoring their outside forces them to realize what is on the inside where it truly counts. One of my favorite quotes from the article comes from a 17 year-old girl, which is definitely a sensitive time for most young girls about their self-image and confidence. She said,
"For the first time in my life, people whom I had never met before, most of who were older than myself, were interested in looking beyond my appearance and into what made me, me. This brought about a comfortable confidence that I hadn't even known was possible, and allowed me to explore myself-- you never realize what is hiding inside until the outside becomes invisible." Isn't that absolutely fantastic?! So not only are kids learning to not tear each other apart on their appearance but it brings about a sense of self-confidence when they also can't say anything negative about themselves.
It all ties into my main point that I made awhile back in another post of just being nice to yourself! No more self-inflicting negative words about your image or body. It's important because we are often our worst critics. I think it's great to hear kids at this camp and how they are better able to come to terms with themselves because they are no longer looking just at the surface. They've learned to appreciate themselves further than skin-deep and feel comfortable being just as they are, who they were created to be.
So, yes, originally I didn't understand what they meant by banning body talk but now that I've researched the concept more I think it's a good idea. I hope that more summer camps will start enforcing rules like this as well as exploring other ways to help kids grow their confidence in themselves and teach to not scrutinize others based off their appearance. For so long we've been taught to judge people by their outsides (maybe not intentionally) that it's time we undo the damage.
Now there are always two sides to every story so I also looked into what people are saying against this...
According to another article I found, experts claim that this kind of ban only makes it worse when kids have to resume school in the fall and are once again bombarded with body talk. Personally, I get what they're saying but I don't think it would be that psychologically damaging to the kids. For one thing, it's not like they've never been around body talk. I'd agree if it was a child who had never discussed their body before and was suddenly thrown into our culture where the focus in on appearance 24/7. But that's not the case because these children have dealt with body talk before. I think it could also have the opposite effect where children spend all summer not talking about their bodies only to realize come fall how superficial those conversations sound. They've spent all summer practicing no body talk that I wouldn't be surprised it's a skill that would potentially help them in school, to realize that there are more important things than other students' appearances. If anything the friends they made at the camp and what they learned could serve as a buffer against the negative talk at school. Either way, I'm no expert and there isn't enough evidence to argue either side. I'm merely just giving my thoughts on the matter and I do believe it could go either way for the kids. Everyone is different so some might have trouble adjusting in the fall while others may not. It seems as though parents would play a huge factor in their child's adjustment based off if they were to also take part in the no body talk.
A second article I found again talks about another con of this ban claiming that it could cause children to repress negative feelings about their bodies. I understand that would be a huge issue but kids should be taught that they are able to confide in someone (parent, sibling, friend) about these negative feelings in order to reach a healthy solution. I think if handled the correct way, banning body talk will not teach children to repress those feelings. What I mean by that is it's important to teach children to not scrutinize others based on their looks but at the same time letting them know that if they are experiencing real problems that it is ok to talk to someone they trust about it in private. If those lines of communication are kept open and nurtured, then children would not think they have to repress their feelings. Yes, that's easier said than done but I don't think that banning body talk at a summer camp could end up being psychologically damaging to a child. If handled the correct way, I think it could be a positive influence. I know there's a lot of room for error in handling delicate situations such as body talk with kids and teenagers but I'm choosing to focus on the positive aspects. Such as the fact that kids are gaining confidences in themselves, have less interest in discussing people's physical features, and learning to accept one another based off who they are not what they wear.
Overall, I'm not trying to argue that this is a perfect solution or that the experts who are against it are wrong, but I'm merely sharing something that I thought was extremely interesting and giving my opinion. Like I said, I'm not an expert and there's not enough evidence about banning body talk yet, but for now I think it's okay for summer camps to enforce these rules. I would definitely consider sending my child, niece, nephew, younger cousin, etc. to a camp where this rule was enforced. According to polls, I wouldn't be the only one in favor!
What do you think?
You can check out the full article here:
http://www.today.com/parents/summer-camp-enforces-one-awesome-rule-make-kids-feel-better-2D79610755
 |
| Image courtesy of today.com |
You can't tell me that those don't look like a bunch of happy kids, right?!
Wednesday, June 18, 2014
Pre-Workout Greek Yogurt
My go-to pre-workout fuel is greek yogurt. It's packed with protein and gives me enough energy to get through my run or workout. It all depends on you, though, because I know that pre and post-workout fuel varies from person to person. For example my sister can't handle dairy before working out or she gets stomach cramps. That's just how her body works and everyone is different when it comes to what your body needs. So don't feel by any means that you have to eat the same stuff that I do before working out. If what I do works for you, then great! But don't be surprised or disappointed when it doesn't and you have to experiment on your own. I used to wish that someone would just tell me what I had to eat but I've found that it's better to find out for yourself through trial and error. It's much more of a learning process! Plus you learn more about your body that you can apply to other nutritional areas later on.

.JPG)
.JPG)

Like I was saying, greek yogurt is my personal favorite and I modify it depending on my workout that day. When I was training for my last half-marathon and logging the double digit miles, I had to incorporate more calories to fuel myself. I would pair my yogurt with an apple or another piece of fruit or even whole wheat waffles or toast. Whatever works for you! Just remember that it's important to find a balance between carbs and protein for both your pre and post-workout food. If I'm doing cardio then I find that my body needs a higher ratio of carbs to refuel but if I'm doing heavy weights then I crave more protein. Again, it all depends on you and what your body needs. I feel like a broken record saying this but I'm gonna make sure that I say it again: I'm not a nutritionist or health expert but just someone sharing their personal experience. So moral of the story is that I'm no professional but I'm just telling you what I do.
Here's an example of what my typical pre-workout yogurt looks like:
Like I said, I'll usually put in some kind of fruit. We had these cute mini apples that were the perfect amount to add! I also put in a little stevia for some sweetness.
I also love to add some cereal or granola for crunch. My two favorite cereals from Trader Joe's are the frosted oat flakes and the bran flakes.
All mixed together!
Here's one where I just had the cereal. I don't always add fruit especially if I'm only going for a regular run or lifting light weights. Like I said, it all depends on your body and your workout!
Some other ideas for you guys to mix in: almond flour, ground flax seed, chia seeds, dried fruit, slivered almonds, granola, nut butters, honey/agave, or whatever else you think could work :) this could also be a great post-workout snack, too! Or just as a simple breakfast on its own!
Tuesday, June 17, 2014
Leftover Steak and Roasted Pepper Salad
I'm known in my family for creating random combinations in salads. If I think the ingredients will work together then I'll most likely throw them all in a bowl. I love experimenting with new flavors and it keeps the salads interesting. So many people always complain about salads being boring but they don't have to be! This weekend we had a bunch of leftovers from my mom's birthday dinner so I decided that was a great opportunity to make a salad. We had steak, grilled peppers and mushrooms, and potatoes. Those all work together right? So why not add some lettuce and other veggies?!
.JPG)
.JPG)
That's pretty much the spot that I always work from. I think about what I like and if the ingredients already work together then all you're doing is adding some lettuce and dressing. Call me crazy but I get requests to make salads at family gatherings so I must be doing something right!
Awhile back I discovered that I like popcorn on top of my salads. I know, you're probably thinking you read that wrong but yes: popcorn! Think about it. We like to have crunchy and salty croutons, right? Well I didn't have any on hand so I figured popcorn would make a good substitute and it does! At least in my opinion.
For this salad I also added some blueberries and chopped up a dried apricot to add some sweetness to cut the acidity of the balsamic vinaigrette I used as the dressing.
So the total ingredients for this salad:
3 oz. steak
1/2 cup grilled peppers and mushrooms
1/4 cup blueberries
1 dried apricot
3 cups mixed greens
2-3 tbsp Skinny Pop popcorn
2 tbsp balsamic vinaigrette
I'm telling you the popcorn works! My sister and mom may think I'm crazy but it makes for a great faux crouton. Especially because I never keep those in the house!
Monday, June 16, 2014
Strawberry Almond Oats
Oatmeal is one of my favorite breakfast foods! I used to think it was so boring and bland when I was a kid but now that I'm older I realize I can pretty much make it however I like. Fresh fruit is always a must and blueberries are my absolute favorite to have with oatmeal but I was out and had to make due with strawberries. I have to say, though, I didn't really miss the blueberries! I also love to add a crunchy ingredient to add more interesting texture to the oatmeal so I chose slivered almonds to stick with the almond theme. I've also used homemade granola, chocolate chips, and graham crackers before! Whatever crunchy topping that's in my pantry that could work I've probably tried out.
1/2 cup rolled oats
1/2 cup sliced strawberries
1 tbsp all natural almond butter
1-2 tbsp sliced almonds
Just cook the oats as directed on the bag and stir in the strawberries, almonds, and almond butter once the oats are ready! I love adding almond butter because it gives the oats such a rich and creamy texture.
Enjoy!
Thursday, June 12, 2014
Re-boosting Your Metabolism!
It's no surprise that I ruined my metabolism completely once I lost the weight because I was afraid of gaining it back. I didn't care that it was healthy muscle and weight that I needed for running, I just wanted to stay thinner because I had deluded myself into thinking I was happy. Except that I wasn't and I wasn't healthy either. Even once I gained the weight back I still wasn't healthy because there were periods of time where I reverted back and would restrict my calories once again and fall back into the cycle. I was desperate to get back to my old weight even with that small voice was telling me it wasn't healthy. I'm glad I eventually listened to that voice in late 2013 and accepted the fact that my body was trying to tell me something. Even with all the restricting last summer, my body wouldn't let go of the weight because I had been so rough on it the whole previous year. With the little amount of calories I was eating, it wasn't going to let go of a single ounce.
You might be in that place now where your metabolism is at rock bottom or at the point where you need to slowly start gaining the weight back in a healthy way. Or maybe you're just looking for ways to improve your metabolism. Whatever your personal reasons, I'm just sharing what I found helpful. I'm going to say this loud and clear right now: I'm not a doctor, or a nutritionist, or any kind of health expert. I'm just sharing my own personal experience and what I found worked for me. I've done plenty of research on restoring my metabolism because I wanted to learn as much as I could to get myself back in a healthy place. So these tips are the result of what information I found that ended up being good for me. There are plenty of other ways to help your metabolism but I'm only including methods that I personally tried and found effective.
1. Increase your calories. I'm going to be honest, I panicked at the thought of eating over 1200 calories on a regular basis because the numbers just seemed too high. It sounds backwards and crazy that you have to eat more to burn more calories but your body needs proper fuel if you've been restricting it for so long. You have to do it gradually though and this is a mistake I made in the beginning. With the cycles of restricting and then trying to make up for it the week after, I wasn't doing it in a healthy way. Start by increasing your calories by 100 a week or even every two weeks. Eventually work your way up to a healthy range which is usually much higher than you might think. I always thought I shouldn't go over 1200 because I was so short but I've found that my body requires much more than that with my activity level.
2. Drink more water. Yeah it might sound like a no-brainer but during the times when I was restricting I didn't always drink that much water because I was afraid of bloating and water weight. I remember when I went to the beach in summer 2012 and hardly drank anything because I wanted my stomach to look flatter in my bikini. I would drink a little bit for my run and that was pretty much it. I've probably tripled my water intake since then and now I drink a minimum of half my body weight in ounces and that doesn't include what I drink for working out.
3. Incorporate strength training. Weights build muscle and guess what? Muscle boosts your metabolism. The bonus of that is your muscles will continue to burn calories even after working out. So the more muscle you have the more calories you burn hence a higher metabolism. Don't be afraid of those weights, ladies! If you need more convincing check out this new post from a blogger I follow: Why Women Shouldn't Be Afraid of Lifting Weights
4. Increase your protein. I try to eat my body weight in grams of protein a day and at least 100g at the very minimum. If you're pretty active and working out a lot like I am then make sure you get enough protein! I had steered clear of it before because once again I was afraid that more protein would lead to more muscle and then an increase in my weight. I'm telling you I was so bent on not seeing that number on the scale go up that I developed so many unhealthy habits. Once I increased my calories and protein I felt an immediate change in my body. I am so much stronger now with the weight training and protein that I can truly tell the difference! Guys, I actually have upper body strength which is something I've never had. I even have arm muscles which was practically unheard of my entire life!
5. Allow yourself a cheat meal or treat a couple times a week. I don't know the exact science to back this up in terms of helping your metabolism but it helped my mindset. It allowed me to have the freedom to enjoy a little treat every now and then. I slowly gained back control and realized that one cupcake wouldn't ruin my life. I used to stress out when there would be a family gathering for a birthday or something special when I knew there would be unhealthy foods because I was afraid to be tempted. Often times it would trigger a binge session because I had been deprived for weeks and all of a sudden I was around the foods I avoided. I was also ashamed and I didn't want my family and friends to see that I was having these problems because I didn't want them to catch on. I was afraid they would try to force me to go to a nutritionist and I would gain the weight back. Once again, unhealthy habits but I was in denial.
6. Eat every 2-3 hours. I did this even when I was restricting but it would be very low-calorie foods such as a handful of vegetables or at the very highest calorie-wise a greek yogurt. I tried to keep all of my snacks under 100 calories and my three main meals around 200 so most of what I ate ended up being low in protein or healthy fats. Now, I make sure to have a good ratio of protein-carbs for each of my small meals to give my body the proper fuel to get through the day. It's made such a difference by being more nutrient-conscious and actually listening to my body for what it needs.
7. Don't skip breakfast/post-workout meal! Your metabolism needs that kick start at the beginning of your day and after a workout. I kill two birds with one stone since I work out in the mornings so my breakfast also becomes my post-workout meal. I usually have a mini pre-workout snack depending on what kind of work-out I'm doing. You want to aim for eating breakfast within an hour of waking up and usually eat 20-60 minutes after working out. I try to eat within 30 minutes to make sure that my muscles are getting the proper nutrients to repair themselves. The harder I work out, the sooner I try to eat.
So there you have it. Seven ways that I was able to get myself back on a healthier track and mindset. Again, I am NOT a doctor or health expert so I could never say exactly if any or all of these would work for you. My goal is only to share my experience with others who may be going through something similar and show them that this is possible. You have to be in the right place though to want to make the change and it took time for me to repair the damage done to my body. In fact it's only been 8 months and I'm still working towards my goal. With plenty of prayer and trust in myself, I know I can reach it! So if you have a goal in mind and are ready to start then please join me!
Tuesday, June 10, 2014
Be-YOU-tiful Tunes!
We all have our ups and downs or as I call them my "blah days" where I'm struggling not to be hard on myself. On those days it helps to surround myself with positivity to give me strength and remind me that I'll get through it. Now bear with me because I know a lot of these songs are cheesy but at the end you'll be feeling more upbeat and better about yourself! Yes it's hard and those days aren't fun but they are the challenges that shape us as a person. I wouldn't have been able to learn from my mistakes if those challenges hadn't been there in the first place. In fact, I'm still learning every day, some days more than others but learning all the same. So, make yourself a mini playlist of these songs and crank up the volume! Because you're beautiful and you deserve to know it :)
"More Beautiful You" by Johnny Diaz
"Beautiful" MercyMe
"Who Says" by Selena Gomez
"Stronger" by Kelly Clarkson
"Gold" by Britt Nicole
"Every Bit of Lovely" by Jamie Grace
"Firework" by Katy Perry
"Don't You Know You're Beautiful" by Kellie Pickler
"Try" by Colbie Caillat
"Life is Beautiful" by Vega 4
***yeah I know this isn't strictly about inner/outer beauty but it's just a song that makes me think about life and appreciate it!
Monday, June 9, 2014
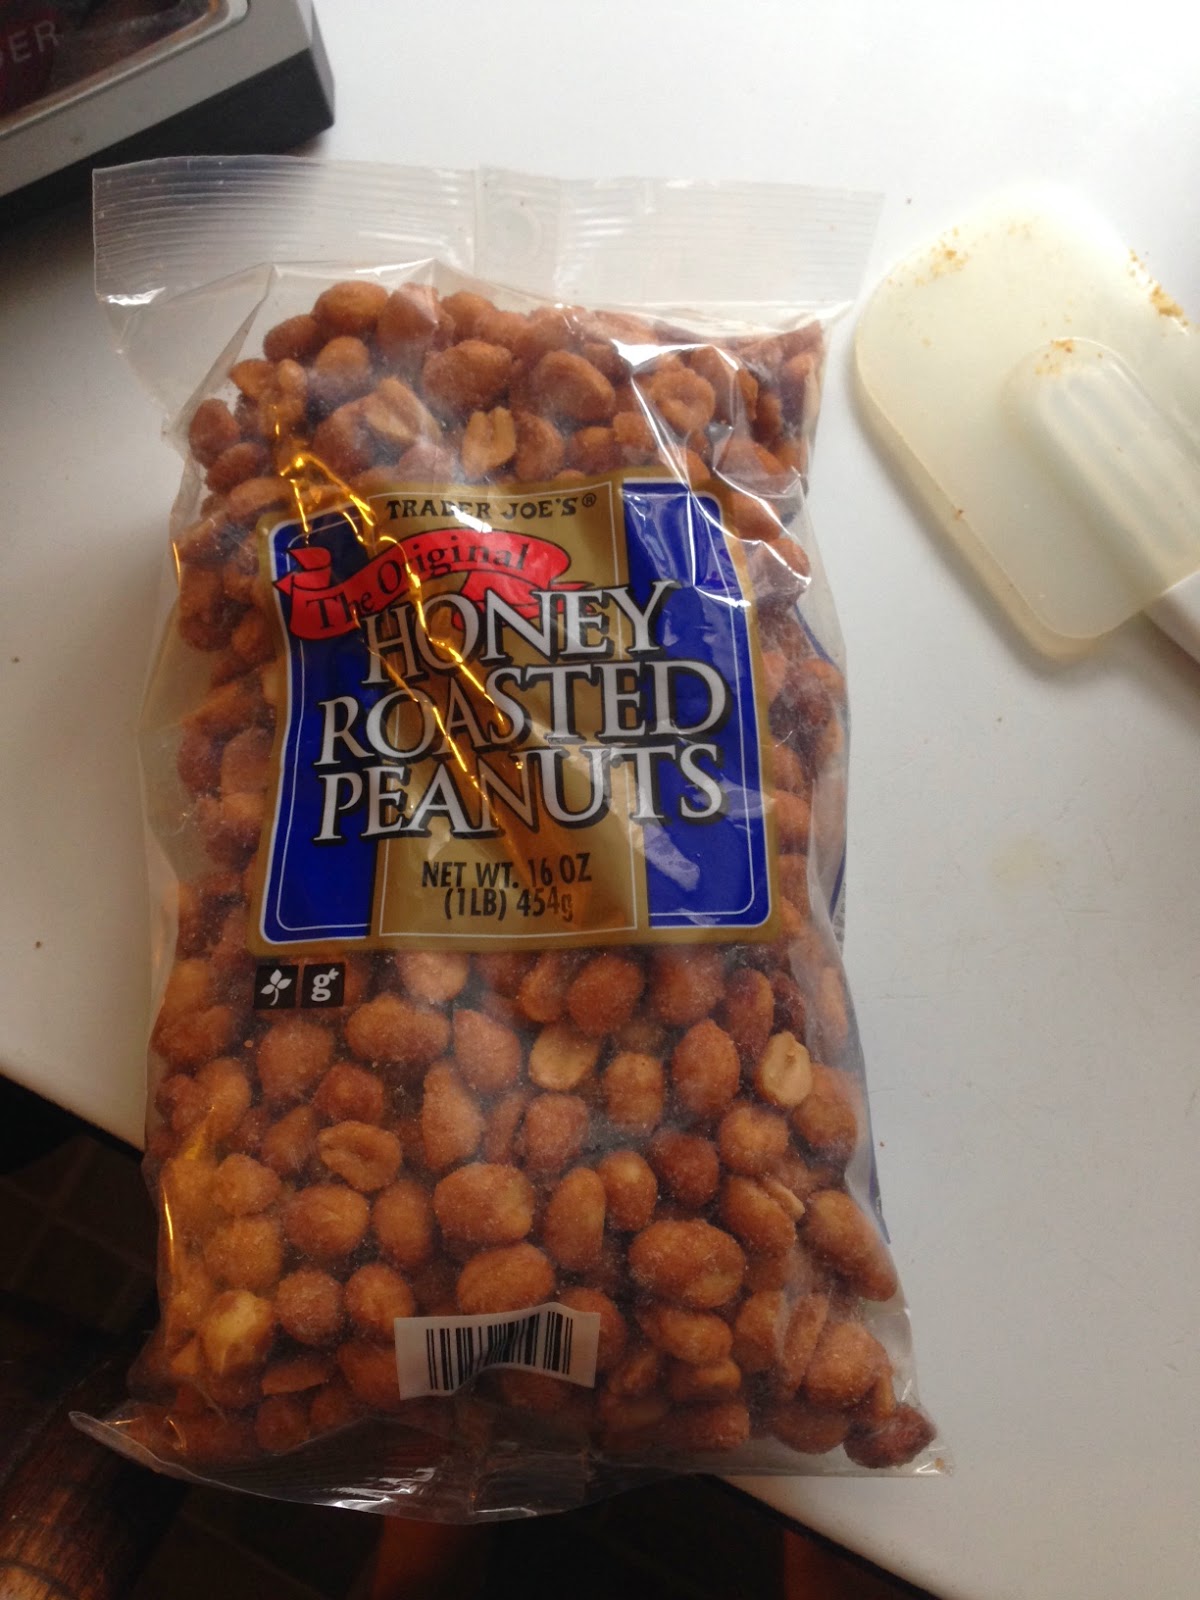
Homemade Honey Roasted Peanut Butter
I never had a clue before how easy it was to make your own nut butters and now I hardly buy them in the store! It's so much easier because I know exactly what goes into the nut butter and I always make sure to get organic nuts. That way I know there's no sort of funny business being added and it's just an all-natural nut butter. If you don't have a food processor or high-powered blender, I would highly suggest investing in one! It's amazing how many simple recipes you can do with one of those babies. Once again, Target is magical because that's where I got my food processor and Ninja blender, both which I love! To be fair the blender technically belongs to my sister but I was the one who bought it for her :)
So, like I said, nut butters sound so much more intimidating to make than they really are. Seriously, the food processor or blender does all the work for you. Pretty much the only skill you need is to be able to scrap down the sides of the processor with a spatula. That's it! You can have tasty nut butter in less than 5 minutes. The other good thing about being able to make your own is that you can make any flavor nut butter you want! Don't get me wrong I love peanut butter and almond butter but do you know what I love even more? Honey roasted peanut butter. It's absolutely amazing and way better than regular peanut butter! It's fun being able to experiment with different flavors of nuts to see which nut butters you like best. I made cashew butter for the first time the other week and I have to say I'm not the biggest fan. I think I'll try a version of honey-roasted cashews or another flavor to see how that would be!
Before trying this recipe, make sure you have a really high-powered blender if you don't have a food processor. My old Oster blender wouldn't stand a chance and not nearly have enough power. The Ninja Ultima we have worked perfectly so make sure your blender has enough power, otherwise, you'll be stuck with a mess of nut crumbs/pieces instead of a smooth butter!
Okay so here are the steps:
1. Pour the bag of nuts into the processor/blender.
2. Turn it on.
3. Watch it turn into butter!
Now, don't worry I'll break it down further for you because there are certain stages that happen during the blending process and the first time I did it I had no clue what was going on and if it would even work. First when you turn it on, it'll kind of turn into a mess of really fine crumbs and you'll think no way it'll smooth out into a paste. But just be patient and give it a minute. I usually stop and start it a few times so that I can scrap down the sides because the crumbs will fly all over the place inside.
Then after another minute it'll kind of harden all together and you'll still think there is no way it'll turn into a paste but still just be patient, I promise it'll work out! Okay so next I've split it up between using a food processor or blender because I've noticed there are differences. I just made it with a blender for the first time yesterday and it worked just as well but the stages go a little differently. So for your convenience I broke it up for you guys!
Food processor method: the next step is that it turns into a giant ball as the crumbs start forming and sticking together. It won't do much for a bit but just kind of form and sit there but eventually it should start spinning around the food processor. I usually have to hold it down at this part because the force of it moving around rocks the food processor. Give it another minute and eventually the ball will slowly break down and it'll turn into a paste! You can either stop it there but it can be on the chunkier/gritty side so I let mine go for a bit longer until it's super smooth and creamy. I can tell mine is at the consistency I like because when I dip in the spatula, the nut butter falls right off it in ribbons.
Blender method: I started the blender off on the highest speed (10 if using a ninja) until the crumbs became really fine. There won't be a ball that forms like in the food processor but slowly you'll see at the bottom the paste beginning to form. It doesn't seem like much is happening but give it another minute. Then I turned it down to a lower setting (1-2) and all of a sudden the paste formed just like that within seconds! I let it go for a little bit longer until it was extra smooth and creamy.
I've found that a 1lb bag (of any nut) makes about 1 jar of nut butter for me. I've just kept some of the old jars from my almond or peanut butter over the years and use those to store my own. It's much cheaper because it's usually around $7 for a jar at the store but mine costs anywhere from $4-6!
In the first stages with all the crumbs and pieces.
Smooth and creamy! This is my favorite part because it's still warm and I usually gobble up a couple spoonfuls. You know, just to make sure it's the right texture... :)
If you find that yours is just so dry and not forming a paste then you can always drizzle in a little bit of extra oil. I've had it happen before with a certain brand of almonds where I just couldn't get it to break down and ended up adding 1/2-1 tbsp. of sunflower seed oil. Of course you could always add the oil just because you like it but I prefer to allow the natural oils of the nuts to break it down into a paste.
Just store it in the fridge like you would do with any other nut butter. And enjoy!
One last quick note: it will firm up in the fridge as it cools down which is why I let it run a bit longer. It might seem too thin to you at the time but I promise it will harden more in the fridge. So it's a good idea to have it seem a little runnier than you might like so that it won't become too thick later on. It's all up to your preferences!
What other nut butter flavors would you like me to post?
Tuesday, June 3, 2014
Eggplant Pizzas
I don't know about you guys but I would pretty much eat pizza as often as I could. Unfortunately it's not always the best for you but I still like to enjoy it in moderation. My aunt makes the most amazing homemade pizza ever and it's such a treat when she makes it! Her Mediterranean pizza is to die for and if she makes pepperoni bread as well then my will power just goes out the window. But hey it's important to treat yourself, right?
So since I can't have pizza every night for dinner, it's always a good idea to explore other lighter options that can still get you that pizza fix! I've made tortilla pizzas before which are a great alternative but I've been seeing so many recipes for eggplant or zucchini pizzas that I wanted to try out my own recipe! I made mine with pesto, arugula, and feta and my sister had the old-fashioned way with pizza sauce and mozzarella. Both versions were delicious! Next time I make them I think I'll add some roasted vegetables or chicken on top.
All you need for this recipe is 1 medium-large eggplant and any toppings you would like! You don't have to use a sauce like pesto or marinara but I think it just makes it more pizza-y plus we all know I'm obsessed with pesto! You could always just use your favorite cheese and meat/veggies on top. It's a pretty versatile recipe and you can adjust it to fit your taste buds. I feel like I say that with a lot of the recipes I post on here but it's true! I think you guys are starting to catch on that mostly what I make is simple, fast, and can be tailored to your preferences!
1. Preheat the oven to 400 degrees. Slice up the eggplant (I made mine about 1/4-1/2 inch) and place on a baking sheet. Drizzle with olive oil and season with salt, pepper, and garlic.
2. Bake the eggplant slices for about 20 minutes. I'm sorry that I don't have a better time range because my oven decided to act weird and wasn't keeping the temperature steady. I have no idea what happened but it's working perfectly fine now, it's just that it took me a little bit longer to roast the eggplant. Anyway, try to shoot for about 20 minutes or so! You want the eggplant to be fork tender but still firm enough that it won't collapse under the toppings.
3. Once the eggplant is roasted take it out of the oven and add your toppings.
4. Bake for another 5 minutes or until the cheese is all melted and gooey!
5. Let the pizzas cool and enjoy! I had grilled chicken with my pizzas and it was the perfect dinner!
I even cut up my leftover pizza to put on top of my salad for lunch the next day!
How do you like to lighten up your favorite recipes?!
Subscribe to:
Posts (Atom)