This morning I focused on my biceps and triceps. Here's the workout that I did:
3x15 standard bicep curls
2x15 tricep push-ups
3x15 hammer curls
3x15 tricep extensions
3x15 Arnold press
2x10 plank with a tricep extension (10 on each arm)
3x15 tricep dips
It took me about 40 minutes to complete.
Happy-almost-Friday!
Thursday, July 31, 2014
Wednesday, July 30, 2014
Mushroom & Onion Salad
I have an obsession with warm things on a cold salad. I couldn't tell you why I do but I think it's so much more interesting to have different temperatures and textures in a salad. As I've said before, I'll pretty much put anything on a salad and love experimenting!
One of my personal favorites is cooking onions to put over a salad while they're still warm. I was looking in the fridge for other ingredients and found some mushrooms as well so I figured why not! I love sauteed onions and mushrooms so why not on top of a salad?
This salad had:
3 egg whites
3 cups mixed greens
1 cup arugula
1/3 orange bell pepper, chopped
3-4 button mushrooms, sliced
1/4 small onion, sliced
handful of cherry tomatoes
raspberry balsamic dressing
To cook the onions and mushrooms all I did was saute them in a small pan on the stove for a few minutes until the onions softened and the mushrooms browned a bit. I seasoned them with salt and pepper and that's all it took!
Enjoy!
Tuesday, July 29, 2014
Blog Feature: The Simple Life
Hi guys! Today I thought I'd share a post from a fellow blogger, Rachael Miner. The past couple weeks I've gotten to know Rachael and let me tell you-- she's awesome! Her blog The Simple Life is full of delicious recipes, fun ways to workout, and healthy living tips. I love her idea behind it all that being healthy shouldn't be complicated, boring, or hard to do (hence the Simple Life). Her passion for health and fitness is truly inspiring to me and I'm glad that I've gotten to know her! I promise you'll love her blog as much as I do so go check it out!
It was so hard to pick just one recipe to share with you guys because there were so many good ones that I was dying to try but this one especially caught my eye: Chocolate Cherry and Nutella Granola Clusters. For starters there's Nutella in the title and I think we can all pretty much agree on that subject, and secondly I'm a sucker for homemade granola. So needless to say this sounds like a brilliant combination that I'm totally in love with!
So without further introduction here is Rachael!

There comes a point in every woman's life when she just needs chocolate. And sometimes fellow women need to step in and help one another out. My mom had been having a rough week and I knew just how to cheer her up.
The one thing anyone who knows my mom will know is she loves chocolate. She also loves granola. I decided to combine the two and thus Chocolate Cherry and Nutella Granola Clusters were born. It is super easy to make and my mom LOVED it! It would make a great gift for any chocolate lover in your life, and nothing is better than a homemade gift- especially one that is edible!
You will need:

 In a microwave safe mixing bowl combine agave nectar/honey and Nutella. Microwave for 15 seconds, stir, microwave for an additional 20 seconds, and stir again until Nutella and agave/honey are fully combined and liquidy.
 Carefully pour Nutella/agave mixture into the oat mixture. Use a spatula to scrap out any remaining Nutella from the bowl. Toss the oat/cherry mixture until all the oats are fully coated.
 Bake for 23 minutes, or until the oats are a darker brown than when they went in. Bake no longer than 27 minutes or it will get too crunchy. The granola will be soft when removed from oven, this is ok. As granola cools it will harden and become crunchy, like normal granola.


It was so hard to pick just one recipe to share with you guys because there were so many good ones that I was dying to try but this one especially caught my eye: Chocolate Cherry and Nutella Granola Clusters. For starters there's Nutella in the title and I think we can all pretty much agree on that subject, and secondly I'm a sucker for homemade granola. So needless to say this sounds like a brilliant combination that I'm totally in love with!
So without further introduction here is Rachael!
Chocolate Cherry and Nutella Granola Clusters
There comes a point in every woman's life when she just needs chocolate. And sometimes fellow women need to step in and help one another out. My mom had been having a rough week and I knew just how to cheer her up.
The one thing anyone who knows my mom will know is she loves chocolate. She also loves granola. I decided to combine the two and thus Chocolate Cherry and Nutella Granola Clusters were born. It is super easy to make and my mom LOVED it! It would make a great gift for any chocolate lover in your life, and nothing is better than a homemade gift- especially one that is edible!
You will need:
- 1 3/4 cups old fashioned oats
- 1/2 cup chocolate chips
- 1/2 cup dried cherries
- 1/4 cup organic agave nectar or honey
- slightly less than 1/2 cup Nutella
- OPTIONAL: 1/3 cup pink and red M&M's for Valentine's Day
Preheat oven to 325 degrees. Line a baking sheet or pan with tin foil. Set aside.
In a large mixing bowl combine old fashioned oats and dried cherries.
In a microwave safe mixing bowl combine agave nectar/honey and Nutella. Microwave for 15 seconds, stir, microwave for an additional 20 seconds, and stir again until Nutella and agave/honey are fully combined and liquidy. Using the spatula spread the coated oat mixture over lined baking sheet. Sprinkle half the chocolate chips over oats, they will melt baking and make the granola even more chocolaty.
Upon removing granola from oven sprinkle the remaining chocolate chips, and maybe even a few extra, over mixture. If you don't want all the chocolate chips to melt wait to add them until the granola is fully cooled. Allow granola to cool for half an hour or until completely cool.
Once cool add chocolate chips and M&M's if desired.
Finally using your hands break granola into clusters. Store in an airtight container for up to three weeks, but it will be eaten long before then ;)
Like I said, it was a difficult job narrowing it down to only one recipe to share and you'll know why once you see the rest of Rachael's recipes!
Monday, July 28, 2014
At-Home Leg Day Workout
With my work schedule, I can't always get to the gym in the morning or even the evening so at-home workouts are perfect for me. In the past couple months I've been doing more lifting and I love it! At heart I'm still a runner and probably always will be but lifting is quickly becoming a tie for my favorite workout. I've seen such awesome results with the weights that I'm working with that I've decided to start experimenting with developing my own workouts.
This morning I decided to focus on legs and glutes so here's the routine that I did:
3x15 standard squats
3x15 dead lifts
100 walking lunges (40, 30, 30)
4x10 single leg squats (alternate legs between sets, 20 total on each leg)
4x10 bowling lunges (again alternate legs, 20 total on each leg)
3x15 calf raises
I was able to do all of these with the weights I have at home! I have adjustable dumbbells and I'm able to have a range of weights from 8-30 pounds on each dumbbell. Since this was leg day and I could handle much heavier weights I stuck with a range of 40-60lbs total. With the squats, dead lifts, and calf raises I used 60lbs (30 in each hand) but for the lunges I used a total of 40lbs. I know it's not a lot compared to some of the heavy lifting girls do but I'm going to work my way up because I plan on swiping more weight discs from my cousin as he still has a ton!
You can start out with any range of weights that you're comfortable with! If you're just starting out, keep in mind that your lower body is the strongest part of your body as there are the biggest muscle groups there. So you might be pleasantly surprised with how much you can handle! Trust me, my legs and glutes were shaking during this workout even though it was all done at home with dumbbells. It just goes to show that you don't always need the equipment at the gym to get in a good workout with weights! The key is to go slow and steady so that you have little momentum which forces your muscles to do all the work.
This routine probably took me about 50 minutes but I plan on adding more and developing other leg day workouts so keep an eye out for those!
What's your favorite workout to do at home?
Sunday, July 27, 2014
Pain on the Pavement: Dealing with Running Injuries
I have had my fair share of injuries from running and all three of them were my own fault. I knew what was sensible and what I should do but let's face it I was just being dumb, plain and simple. I was a firm believer in no pain, no gain but that's not the best motto in the running world. Or in any fitness for that matter, especially when it's true pain and not just pushing yourself through a good workout.
But I've learned from my mistakes and I'm not nearly as strict as I used to be. I realized that if I want to keep up with running and the rest of my workouts then I actually have to preserve my body now to make sure my young habits don't come back to bite me later on.
***Before I go on please keep in mind I am not a professional. What I'm writing about is strictly based off my own experience, the opinion of my doctors, and my own research. This post is only meant to provide you with information about common injuries from running. I am in no way claiming that each of these will work for you or that it will cure your injury. The sole purpose is to be informative and compile some resources for you guys. I'm not a doctor and I don't know what injury you might be dealing with so please consult your physician before trying any of these methods.***
So, two common injuries that I dealt with are shin and knee pain. This is certainly not going to be an exhaustive list of injuries but I'll mainly talk about my experience with my injuries and how I recovered. Plus, I've also included some articles that might help point you in the right direction. Again make sure you talk to your doctor or physical therapist first!
First and foremost if you experience any unusual pain while running then promptly STOP RUNNING. Sounds like common sense, right? But let me tell you there was a time when I would run the miles I had set my mind to, no matter what. I hate to admit this but I have run several and I mean several miles while in severe pain because I wanted to finish my run. I figured I would deal with the pain once I got back but my priority at that moment was to get my run in because if not I would fail and that meant I was weak. The mantra of "no pain, no gain" would be running through my head, feeding my pride and stubbornness. Well you can imagine that didn't help my injuries in the slightest.
1. IT Band Pain
In December 2011, I injured my right knee pretty severely and didn't know exactly what it was but I figured I would deal with it on my own. Luckily, it was an injury that could be remedied at home: heat, stretching, and rest. At the time, though, I wasn't willing to take the time and care my knee needed to fully heal.
The day I injured my knee was a run like any other run. I didn't fall or land on my foot funny, it just happened. My sister and I were over halfway into our run and suddenly I got a weird burst of heat on the outside of my right knee. It wasn't that painful but felt sort of abnormal. I brushed it off though and we finished another 3 miles. By the time we got home and I showered, I was limping. I never had this severe of pain before and my sister suggested I take several rest days maybe even weeks.
I wasn't willing to take that much time off of running so I allowed myself two rest days and decided that I would pick it back up like nothing happened. This resulted in a 3-month long battle of the pain suddenly resurfacing at any time during a run. And I'm talking real pain, bursts of heat and then shooting pains running up and down on the outside of my right knee. I would be limping during my run but figured I might as well finish because I was already out for my run. When I got home, I would stretch it a lot and apply heat and ice in intervals for an hour twice a day. Then I would go running the next day and it would be fine for another few days.
When I went to my doctor about my shin pain, I asked him about my knee out of curiosity and he was able to explain. After examining my knee, he told me it was my IT band which is a large tendon in your leg that runs from your hip down past your knee. It's not uncommon for runners to develop this pain, especially if you run a lot of hills. Since Oakmont is one giant hill and Oakland wasn't much better, it wasn't surprising that I had been injured. He told me to do pretty much what I had already done with the stretching, ice, and heat except this time to give it adequate rest, too. To read more about IT band pain check out these articles from Active and Athletico
2. Shin Splints
The other two injuries that I dealt with were shin-related.When I went in for my right shin in March 2012, my sports doctor originally thought it was another stress fracture (I had one in high school in my left shin) just based off looking at it from the surface. He wanted to be sure, though, and scheduled an MRI. The results showed that it was a very severe shin splint that was just on the verge of becoming a fracture. Which means I lucked out and managed to squeak by. My doctor, however, said I needed physical therapy because my shin and knee problems were stemming from weak hips. It was creating a ripple effect down my leg because my knee and shins were trying to compensate for the instability from my hips not being able to control the motion of my leg as I ran. I likely had this problem in high school as well but my previous doctor only had me be on crutches for 6 weeks without any physical therapy. So when I picked running back up in college, my hips were still weak.
At physical therapy they worked with me on strengthening my hips and gave me plenty of exercises to do at home. I'll share some of those exercises because they helped me immensely. Even if you don't have any injuries, it's always a good idea to do some of these for prevention. I kept up with these for a year after my original injury just to make sure my hips were strong enough. Now with all the lifting I do I get plenty of strength exercises for my hips and glutes that I don't necessarily have to do these old exercises anymore. Still, it's nice to know that if I start experiencing that pain again I know what I have to do and I know that I will do it.
Here are some of the exercises my therapist had me do:
1. Single Leg Bridge
- Lie on your back with your feet hip distance apart. Keep one knee bent but extend your other leg straight. Push your weight into your heel as you lift your hips off the floor to create a "bridge" while simultaneously lifting the extended leg straight in the air. Hold for 5 seconds and then lower your leg and hips back to the floor. Do 10 reps on one leg and then repeat on the other side. Progressively add in more reps as your hips get stronger. By the end of physical therapy they had me doing over 50 per leg.
These are only a couple of exercises that I did at therapy but others included: single leg squats, forward and reverse lunges, weights, resistance band training, and working on the ski machine. Like I said consult your doctor because they can tailor a program to fit your individual needs. For more information about shin splints check out these articles from Runner's World and Active
But I've learned from my mistakes and I'm not nearly as strict as I used to be. I realized that if I want to keep up with running and the rest of my workouts then I actually have to preserve my body now to make sure my young habits don't come back to bite me later on.
***Before I go on please keep in mind I am not a professional. What I'm writing about is strictly based off my own experience, the opinion of my doctors, and my own research. This post is only meant to provide you with information about common injuries from running. I am in no way claiming that each of these will work for you or that it will cure your injury. The sole purpose is to be informative and compile some resources for you guys. I'm not a doctor and I don't know what injury you might be dealing with so please consult your physician before trying any of these methods.***
So, two common injuries that I dealt with are shin and knee pain. This is certainly not going to be an exhaustive list of injuries but I'll mainly talk about my experience with my injuries and how I recovered. Plus, I've also included some articles that might help point you in the right direction. Again make sure you talk to your doctor or physical therapist first!
First and foremost if you experience any unusual pain while running then promptly STOP RUNNING. Sounds like common sense, right? But let me tell you there was a time when I would run the miles I had set my mind to, no matter what. I hate to admit this but I have run several and I mean several miles while in severe pain because I wanted to finish my run. I figured I would deal with the pain once I got back but my priority at that moment was to get my run in because if not I would fail and that meant I was weak. The mantra of "no pain, no gain" would be running through my head, feeding my pride and stubbornness. Well you can imagine that didn't help my injuries in the slightest.
1. IT Band Pain
In December 2011, I injured my right knee pretty severely and didn't know exactly what it was but I figured I would deal with it on my own. Luckily, it was an injury that could be remedied at home: heat, stretching, and rest. At the time, though, I wasn't willing to take the time and care my knee needed to fully heal.
The day I injured my knee was a run like any other run. I didn't fall or land on my foot funny, it just happened. My sister and I were over halfway into our run and suddenly I got a weird burst of heat on the outside of my right knee. It wasn't that painful but felt sort of abnormal. I brushed it off though and we finished another 3 miles. By the time we got home and I showered, I was limping. I never had this severe of pain before and my sister suggested I take several rest days maybe even weeks.
I wasn't willing to take that much time off of running so I allowed myself two rest days and decided that I would pick it back up like nothing happened. This resulted in a 3-month long battle of the pain suddenly resurfacing at any time during a run. And I'm talking real pain, bursts of heat and then shooting pains running up and down on the outside of my right knee. I would be limping during my run but figured I might as well finish because I was already out for my run. When I got home, I would stretch it a lot and apply heat and ice in intervals for an hour twice a day. Then I would go running the next day and it would be fine for another few days.
When I went to my doctor about my shin pain, I asked him about my knee out of curiosity and he was able to explain. After examining my knee, he told me it was my IT band which is a large tendon in your leg that runs from your hip down past your knee. It's not uncommon for runners to develop this pain, especially if you run a lot of hills. Since Oakmont is one giant hill and Oakland wasn't much better, it wasn't surprising that I had been injured. He told me to do pretty much what I had already done with the stretching, ice, and heat except this time to give it adequate rest, too. To read more about IT band pain check out these articles from Active and Athletico
2. Shin Splints
The other two injuries that I dealt with were shin-related.When I went in for my right shin in March 2012, my sports doctor originally thought it was another stress fracture (I had one in high school in my left shin) just based off looking at it from the surface. He wanted to be sure, though, and scheduled an MRI. The results showed that it was a very severe shin splint that was just on the verge of becoming a fracture. Which means I lucked out and managed to squeak by. My doctor, however, said I needed physical therapy because my shin and knee problems were stemming from weak hips. It was creating a ripple effect down my leg because my knee and shins were trying to compensate for the instability from my hips not being able to control the motion of my leg as I ran. I likely had this problem in high school as well but my previous doctor only had me be on crutches for 6 weeks without any physical therapy. So when I picked running back up in college, my hips were still weak.
At physical therapy they worked with me on strengthening my hips and gave me plenty of exercises to do at home. I'll share some of those exercises because they helped me immensely. Even if you don't have any injuries, it's always a good idea to do some of these for prevention. I kept up with these for a year after my original injury just to make sure my hips were strong enough. Now with all the lifting I do I get plenty of strength exercises for my hips and glutes that I don't necessarily have to do these old exercises anymore. Still, it's nice to know that if I start experiencing that pain again I know what I have to do and I know that I will do it.
Here are some of the exercises my therapist had me do:
1. Single Leg Bridge
- Lie on your back with your feet hip distance apart. Keep one knee bent but extend your other leg straight. Push your weight into your heel as you lift your hips off the floor to create a "bridge" while simultaneously lifting the extended leg straight in the air. Hold for 5 seconds and then lower your leg and hips back to the floor. Do 10 reps on one leg and then repeat on the other side. Progressively add in more reps as your hips get stronger. By the end of physical therapy they had me doing over 50 per leg.
 |
| Courtesy of Google Images |
2. Side-lying Leg Lift
- Lie on either your right/left side with your legs straight. Raise your top leg into the air as high as you can get it to go. Slowly lower it back to the floor before lifting it into the air again. Do 20 reps per side. Once you get up to 30 per leg then add in ankle weights to make it more difficult (if you have weights). If you don't have weights then just continue to increase your reps.
 |
| Courtesy of Google Images |
3. Stair Leg Lower (Front)
- Stand on the bottom stair of a staircase and extend your right foot so that it comes off the stair. Bend your left knee as you lower your right heel to tap the floor, keeping your right foot flexed. Just lightly touch the floor so that your weight will still stay all on your left leg. DO NOT let your left knee cave in to the right as it tries to support your weight. Make sure your left knee stays firmly in place as it requires strength from your hip to do that. Otherwise, you'll end up hurting your left knee and it won't work your left hip. Start out with 15 reps but try to work up to 45. Repeat with the other side and make sure you keep your knee straight.
*note: make sure to look straight ahead while doing this one. It's hard because you'll want to check that your knee is in the proper position but try to look down only every once in awhile. If you have a mirror it's even better because then you won't have to look down. After a few reps you'll get the feel of when your knee is in the right or wrong position. My therapist always scolded me for looking down during this set because then it would affect my running form later on.
4. Stair Leg Lower (Side)
- Stand on the bottom stair of a staircase but this time turn to the side so that your left foot is running against the edge of the stair and you have to hold your right foot in the air. Bend your left leg as your lower your right foot to the floor and gently tap the floor with the top of your foot while still keeping all your weight in your left leg. Again, DO NOT let your left knee cave to the right as it tries to hold your weight. Trust me, it will automatically try to do this but it's crucial that you keep your knee in position, over top of your ankle and in line with the rest of your leg. Start out with 15 per leg and increase your reps in increments of 5 as you get stronger.
 |
| Courtesy of Google Images |
I don't want to keep this post that much longer for your guys' sake but I've included some links to more information. Most of the injuries are repetitive but I like how each article has different sources and cites various professionals on the topic so that always opens more avenues to explore.
Saturday, July 26, 2014
Chocolate Chip Zucchini Cookies
Sorry for being off the grid for a couple days but time got away from me and then yesterday I got my wisdom teeth out and the anesthesia really knocked me off my feet. I have a few posts to catch up on that I was planning on putting up a couple days ago but other stuff came up. I'm feeling back to normal today so I figured it was a good time to catch up on blogging during my lazy morning!


Good thing I have the best buddy to keep me company! :)
I haven't been a very good patient because I'm not one to be able to sit around in bed. Also, this no solid foods rule is getting in the way of my macros which has been frustrating but I've just had to get creative and find ways to balance them! Smoothies have been my best friend and a good way to get my nutrients for the day.
I also lucked out because I only had my top two wisdom teeth. It was interesting to learn that bottom wisdom teeth are the most common teeth to be missing, and since they're vestigial eventually people will no longer even develop wisdom teeth. My oral surgeon told me I was very evolved so my descendants will have me to thank when they won't need to deal with getting their teeth removed!
So this afternoon I got bored and didn't want to be on bed rest. I haven't been able to run or lift but I still took Layla for 2 long walks today, 3 miles in the morning and 3 in the afternoon. I'll probably even take her for a third walk after dinner to pick up a movie for tonight. That's the closest I can get to taking it easy. Since I have an 8-month old puppy and no one else to walk her, I have to do it myself! Otherwise, she'll drive the cats and me crazy with all her hyper energy.
I'm able to handle softer foods and cookie dough and cookies count as soft, right?! My friend at work brought in chocolate chip zucchini bars for my birthday last week and it got me brainstorming. So today I decided to make a healthy version with cookies!
These cookies are full of vitamins from the zucchini and healthy fats from the coconut oil! I substituted in whole wheat flour, coconut oil, egg whites, stevia, honey, coconut sugar and applesauce. I've been doing a lot of research about making substitutions in recipes and I'm happy to say that it paid off in this recipe!
Ingredients:
1 1/2 cups whole wheat flour
1 cup oats
1 tsp cinnamon
1/2 tsp baking soda
1/4 tsp sea salt
1/4 cup baking stevia
1/3 cup blonde coconut sugar
1 tbsp honey
1/4 coconut oil, melted
1/4 cup unsweetened applesauce
1 large egg white
1 1/2 tsp vanilla extract
1 1/2 cups grated zucchini
1 cup semi-sweet or dark chocolate chips

Directions:
1. Preheat the oven to 350 degrees
2. In a large bowl mix together the flour, oats, cinnamon, baking soda, salt, stevia, and coconut sugar.

3. In a second bowl mix the honey, egg white, vanilla, and applesauce.

4. Melt the coconut oil in the microwave and mix it in with the wet ingredients.
5. Mix the wet ingredients into the dry. If the dough is a little dry then you can add an extra tablespoon of applesauce to moisten it up a bit.
6. Before adding the zucchini I drained out a bunch of the water by squeezing it through a paper towel. If you don't drain the zucchini then you probably won't have to add extra applesauce. Add in the grated zucchini and mixed until combined. Then add in the chocolate chips.

6. Before adding the zucchini I drained out a bunch of the water by squeezing it through a paper towel. If you don't drain the zucchini then you probably won't have to add extra applesauce. Add in the grated zucchini and mixed until combined. Then add in the chocolate chips.
7. Scoop tablespoon and a half sized cookies onto a baking sheet that's either greased or lined with a silpat sheet. I halved the recipe when I first made it since I was low on taste-testers this weekend but still got 14 cookies!
8. Bake for 11-13 minutes until the edges and bottoms are golden brown. Let the cookies cool on the sheet for about 10 minutes.

If you're worried about the cookies tasting like coconut or zucchini, don't worry! I wasn't sure how the cookies would pan out but the taste and texture reminds me of zucchini bread.


If you're worried about the cookies tasting like coconut or zucchini, don't worry! I wasn't sure how the cookies would pan out but the taste and texture reminds me of zucchini bread.
Each cookie has only 108 calories, 4g fat, 14g carbs, and 2g of protein. Not bad for being full of gooey chocolate! Needless to say I ate 3 fresh from the oven for my afternoon snack!
Now my next challenge for the day is finding a macro-friendly dinner that'll be easy on my teeth.
Good thing she likes Office marathons as much as I do!
Hope you're all enjoying your Saturday :)
Tuesday, July 22, 2014
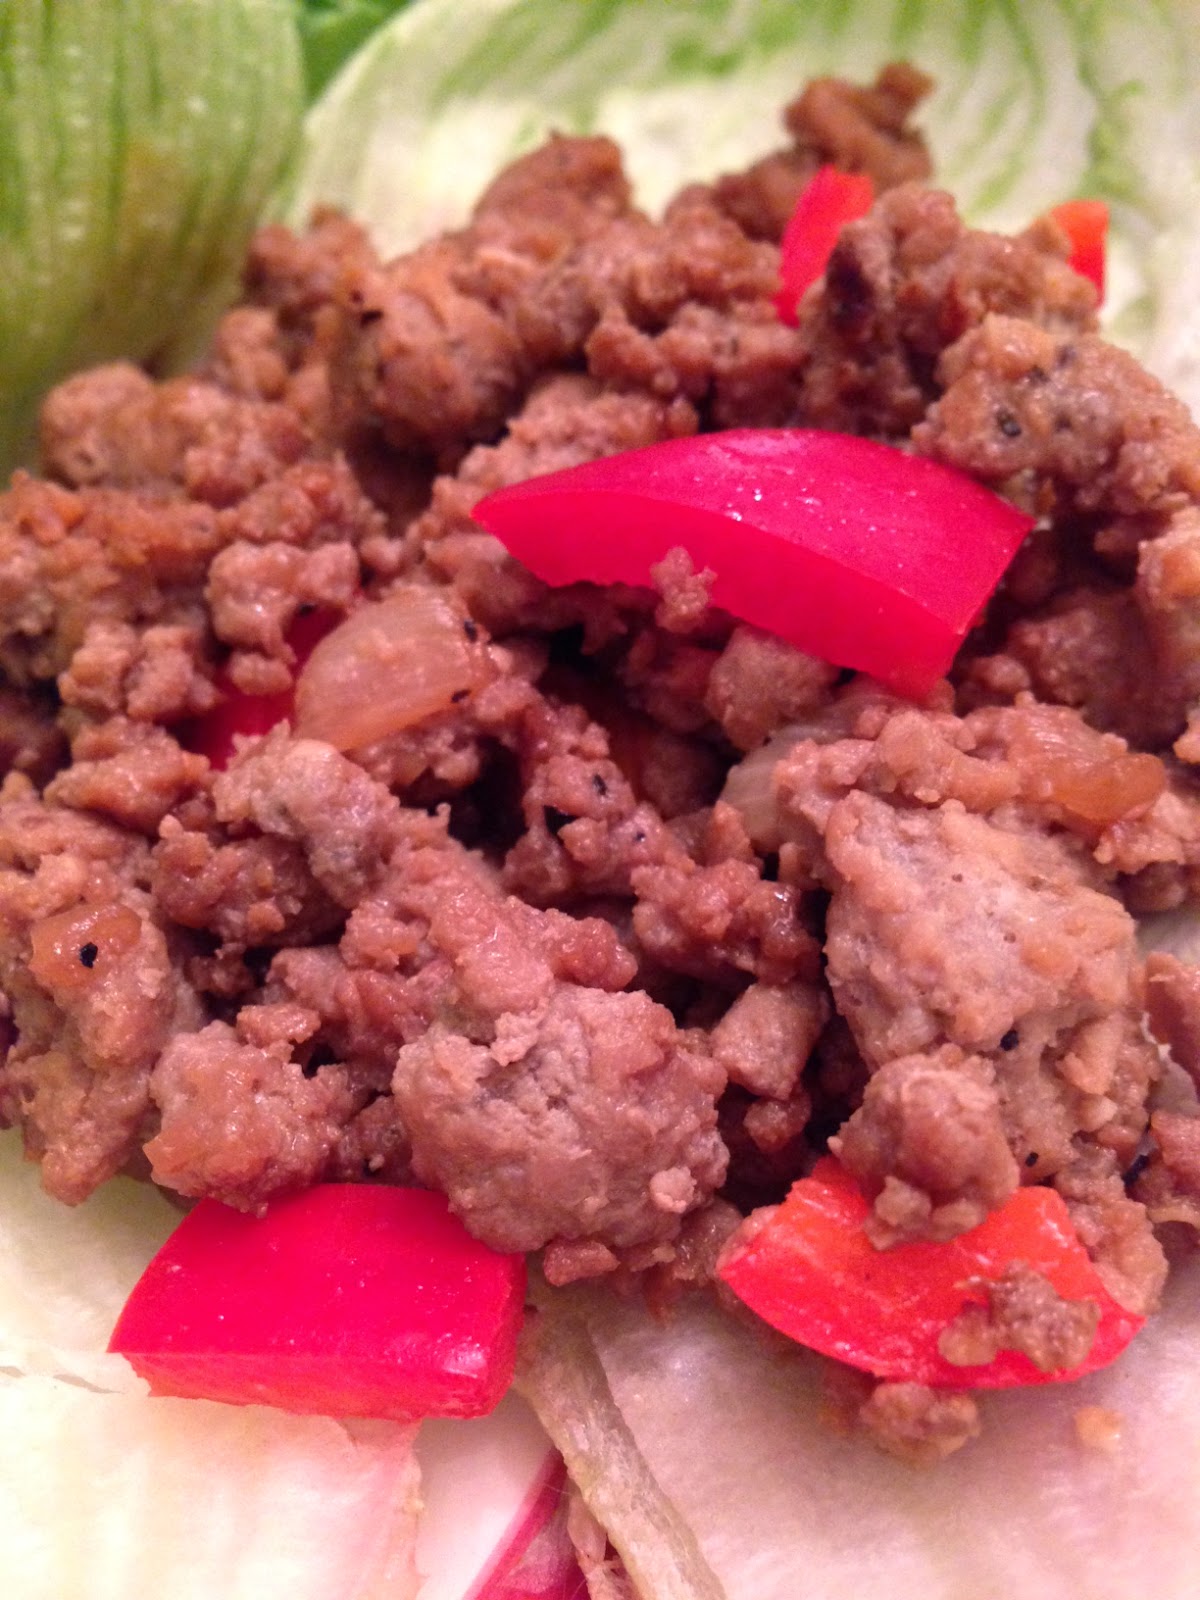
Ground Turkey Lettuce Wraps
Whenever I order Chinese food I love, love, love to get lettuce wraps as an appetizer! It seemed like a simple enough concept so I figured I would try making my own version. This recipe has quickly become popular with my family and friends so I thought it was about time to share it! I can't promise that it'll be better than P.F. Chang's but I can promise you that it'll be better on your wallet and your body without all the extra sodium. So in the end it's really a win-win right? Please just say yes for the sake of my feelings.
What you'll need:
1 lb lean ground turkey
1 head iceberg lettuce
1 red bell pepper, diced
1/2 cup water chestnuts, diced
1 shallot, diced
1 tbsp sesame oil
1/2 tsp ground ginger
1 tsp ground mustard
1 tbsp minced garlic
2-3 tbsp low sodium soy sauce
salt and pepper to taste
Here's how you make them:
1. On medium-high brown the meat and season it to taste with salt and pepper. Be careful with the salt because remember you'll be adding in the soy sauce later. I always recommend using low sodium soy sauce in any recipe because you can quickly lose control of the salt content with regular soy sauce. It's not only healthier for you to use low sodium but easier to keep the flavor in check. You can always add a little more salt at the end if you find the dish still needs some.
2. Dice up all the veggies and add the pepper and shallots to the pan. Don't add the water chestnuts just yet because I've found if you add them too early they won't stay as firm and crunchy.
3. Let the meat cook all the way through and allow the peppers and onion to soften.
4. Once the mixture is cooked through add in the sesame oil, spices, garlic, and water chestnuts.
5. Cook for another 1-2 minutes.
6. Add in the soy sauce. Here's where it depends on your taste level. I like to only put on a medium amount of soy sauce which is why I suggest using 2-3 tbsp which is just enough to coat the mixture but you can always use more or less. The same goes with the garlic. I'm a huge garlic fan so often times I'll even add an extra tbsp to give it an extra kick of garlic.
7. Peel apart the lettuce head into separate little cups. This is always tricky and I end up with quite a few pieces of lettuce that are torn! I'm not trying to impress anyone though so we just deal with the weirdly shaped lettuce cups.
I had my wraps with some roasted squash and zucchini! It was another great summer dinner. The lettuce makes the dish so light and fresh!
This recipe usually yields about 6 wraps which is perfect for the 3 of us!
Hope you're all having a good start to the week :)
Monday, July 21, 2014
Coconut Sugar-Glazed Butternut Squash
I have fallen in love with butternut squash over the past few months and probably make it at least once a week. It's great as either a savory or sweet dish but lately I was thinking about trying out the sweet route just to switch things up. At Christmas my aunt made a delicious sweet butternut squash dish but it was loaded with butter and brown sugar so it wasn't exactly health-friendly. So I decided to try out my own version for dinner last night! I subbed the brown sugar for coconut sugar and the butter for olive oil.
.JPG)
It's super simple and you only need 4 things:
1 lb cut butternut squash
2 tbsp light brown coconut sugar
1 tbsp olive oil
sprinkle of sea salt
Also, I have a bit of a disclaimer-- I didn't cut the squash myself! At Trader Joe's you can actually get a container of it pre-cut which makes things very helpful. I've never tried cutting a butternut squash before but I've seen plenty of chefs do it on their shows and even they say it's pretty difficult. I've been too intimidated to do it myself but maybe some day I'll work up the nerve to tackle it!
1. Preheat the oven to 400 degrees
2. On a baking sheet place the squash and drizzle it with the olive oil and coconut sugar. Mix it all together with your hands to make sure each piece is evenly coated with the sugar.
3. Sprinkle on some sea salt. I probably used about 1/2-1 tsp just to cut a bit of the sweetness.
4. Bake for about 20-25 minutes. Mine is usually done around 20 minutes but it depends on your oven. Just check to see when the squash is tender and the sugar has caramelized.

You can always add more sugar to make it sweeter if you would like but I found 2 tbsp was a good balance so that the sugar wasn't overpowering.
Enjoy!
Sunday, July 20, 2014
Zucchini Fries
When I was a kid my mom would always make fried zucchini in the summer. Even now fried zucchini reminds me of summer when I was younger and we knew summer had officially began when my mom would start making fried zucchini. It was perfectly crispy and crunchy, we couldn't get enough of it! Covered in bread crumbs, fried in olive oil, and topped with season salt while still hot, what more could ya ask for?!
My aunt has a pretty flourishing garden so she always supplies us with the best zucchini. The one she gave us the other day was enormous! I'm not even kidding, wait until you see the pictures. My sister and I had no clue what we wanted to make with all the zucchini until I remembered the time I had made zucchini fries. It's a much healthier option than my mom's fried zucchini but it's a satisfying substitute for the real thing. As my sister said last night the fries were delicious but the original fried zucchini is still "the bomb dot com" and.....I have to agree. But, like I said these zucchini fries are a perfectly acceptable alternative to the original!
So when you can't splurge for the original fried zucchini slices then why not try these lovely baked fries? I still kept the breadcrumb coating but decided to give baking them a try to give them a healthy twist. You can also do plain slices rather than fry shapes but I had seen a picture of zucchini "breadsticks" that were sorta shaped like fries so I figured fries might be fun!
What you need for this recipe is:
1-2 medium zucchini
1-2 eggs, lightly beaten
1 1/2-2 cups organic bread crumbs
1. Preheat oven to 425
2. Slice up the zucchini into "fries". Since this zucchini was so large first what I did was cut it into 4 sections and then cut each of those in thirds and then was able to cut the thirds into little "fries".

3. Once you have all your fries cut up, crack 2 eggs in one bowl and lightly beat them to break up the yolks. In the second bowl, measure out your breadcrumbs. I would start with only 1 egg and then 1 cup of bread crumbs. I'm never sure exactly how much I'll need since it depends on the size of your zucchinis. Since this one was huge, I think I used close to 2 1/2 cups of bread crumbs! We got a ton of fries out of this one.


My aunt has a pretty flourishing garden so she always supplies us with the best zucchini. The one she gave us the other day was enormous! I'm not even kidding, wait until you see the pictures. My sister and I had no clue what we wanted to make with all the zucchini until I remembered the time I had made zucchini fries. It's a much healthier option than my mom's fried zucchini but it's a satisfying substitute for the real thing. As my sister said last night the fries were delicious but the original fried zucchini is still "the bomb dot com" and.....I have to agree. But, like I said these zucchini fries are a perfectly acceptable alternative to the original!
So when you can't splurge for the original fried zucchini slices then why not try these lovely baked fries? I still kept the breadcrumb coating but decided to give baking them a try to give them a healthy twist. You can also do plain slices rather than fry shapes but I had seen a picture of zucchini "breadsticks" that were sorta shaped like fries so I figured fries might be fun!
What you need for this recipe is:
1-2 medium zucchini
1-2 eggs, lightly beaten
1 1/2-2 cups organic bread crumbs
1. Preheat oven to 425
2. Slice up the zucchini into "fries". Since this zucchini was so large first what I did was cut it into 4 sections and then cut each of those in thirds and then was able to cut the thirds into little "fries".
Like I said, this zucchini was huge! It was as long as the baking sheet and probably close to 6 inches in diameter at the thickest part.
3. Once you have all your fries cut up, crack 2 eggs in one bowl and lightly beat them to break up the yolks. In the second bowl, measure out your breadcrumbs. I would start with only 1 egg and then 1 cup of bread crumbs. I'm never sure exactly how much I'll need since it depends on the size of your zucchinis. Since this one was huge, I think I used close to 2 1/2 cups of bread crumbs! We got a ton of fries out of this one.
4. Take each slice of zucchini and first dip it in the egg mixture then the bread crumbs. Make sure each slice is evenly coated and place it on the baking sheet.
I left some of the zucchini plain to save some leftovers for tomorrow. The three of us didn't need that many fries so I figured I could use some for my lunch the next day!
5. Bake for 30 minutes. I set the timer at 15 minutes and flip them halfway through so that they brown on both sides. Once they're done the outside should be golden and crispy but inside the zucchini should be tender. I love how there are two different textures with these fries!
I paired mine with barbecue chicken and it was the perfect summer dinner! Definitely brought me back to my childhood even though it wasn't the exact same as the original. I'm all about re-creating comfort foods but in a healthier way. This recipe certainly succeeded at that!
As soon as they came out of the oven I sprinkled them with some sea salt. My mom always used season salt, which was great too but I was feeling like switching it up so I used sea salt. I have to say I don't know which one I liked better. We didn't really use sea salt a lot when I was younger but I'm a huge fan of it now. It definitely made the recipe!
To keep up with the fry theme I had mine with some ketchup and like I said I wasn't missing real fries or even the original recipe. Even though the fried zucchini from my childhood will always be my favorite, these fries are a welcome substitute!
And as always, I had the best helper in the kitchen :)
Happy Sunday!
Saturday, July 19, 2014
You Don't Have to Try So Hard
Let me start off by saying that this video gave me chills and brought tears to my eyes. Every single word spoke to me. I think the lyrics are beautiful and hit home hard. I had such an emotional reaction to this video because I have gone through the struggles of not being comfortable in my skin-- how I looked or who I am. I didn't have any confidence and it took a toll on me both physically and emotionally.
This song and video send a beautiful message to not only young girls but women of all ages. I love the range of ages that they use in the video because often times I feel as though the focus can be placed more on younger girls. Don't get me wrong, I think it's just as important to send these messages to young girls and stop the cycle before it takes hold but there are also older girls and women that need to be healed. It's just as crucial to reach them because they might be getting unintentionally neglected. It's equally important to heal those from the cycle as well as prevent it from starting in younger generations. So I think it's wonderful that this video shows that no matter your age, you don't have to try so hard.
https://www.youtube.com/watch?v=GXoZLPSw8U8
This song and video send a beautiful message to not only young girls but women of all ages. I love the range of ages that they use in the video because often times I feel as though the focus can be placed more on younger girls. Don't get me wrong, I think it's just as important to send these messages to young girls and stop the cycle before it takes hold but there are also older girls and women that need to be healed. It's just as crucial to reach them because they might be getting unintentionally neglected. It's equally important to heal those from the cycle as well as prevent it from starting in younger generations. So I think it's wonderful that this video shows that no matter your age, you don't have to try so hard.
Run the extra mile
Keep it slim so they like you, do they like you?
Two lines into the song and I already felt like I had been hit over the head. This part immediately spoke to me because I can 100% relate to this when I was restricting myself. Before I developed an unhealthy relationship with food, running was my therapy, my outlet. All the stress of schoolwork would melt away as I would pound out the miles on the pavement. It was a healthy way for me to control my stress levels and I looked forward to my daily runs. But it quickly turned into a weapon against myself when I fell into unhealthy habits. Running and working out became a punishment for my body. If I would go over a few calories or just felt like I was getting fat (when I was even still losing weight), I would bump up my miles or make myself do extra workouts. I remember telling myself as I was running, "Do you want to stay fat? Because that's what's going to happen if you don't run another 3 miles". I soon began dreading my runs because it turned into something negative and unhealthy for myself even though I didn't realize that. I thought that the more I ran, the more I would lose weight, the better I would look in other peoples' eyes, and then I would finally be happy.
But I didn't and I never would. You know why? Because self-love and confidence doesn't come from how other people view you. A million people could tell you that you look beautiful, have a perfect body, etc. but if you don't see it and feel it, then their words are pointless. I still didn't understand that and so I would keep trying so hard to make myself more beautiful in terms of societal standards. I would look at the girl in the magazine and think to myself that if I just would strive to look like her then everything would fall into place.
Put your make up on
Curl your hair
Get your sexy on
These pieces spoke to me as well because I used to hate wearing my glasses. My eyes are really sensitive and it can be hard for me to wear contacts all day but I would force myself because I thought I was uglier in my glasses. That people would think I was nerdy and not beautiful because how many models do you see wearing glasses? Not counting eyewear advertisements, of course. Now I probably wear my glasses more than half of the time and I feel just as confident in them. I still like to wear my contacts as often as my eyes will allow because if you wear contacts then you know that you see better since you get 360 degrees of clear vision instead of being restricted by your glasses lens. But the point is I used to think that I shouldn't wear glasses because it wasn't "sexy" and that boys wouldn't be interested in me. After all, society was telling me glasses were a bad thing, right? So I would force myself to put in my contacts even though my eyes would get dry and irritated but I thought it was worth the sacrifice.
I also felt like I constantly had to have my hair and make up perfect. I don't know how I did it but every day in high school and college I would blow dry my hair and straighten it. I would work so hard to get my hair and make up perfect as well as find the perfect outfit, that it probably took me over an hour and a half to get ready. Honestly, I couldn't do that now. Most days I let my hair air dry since I work out in the mornings and I wear a third of the amount of make up that I used to. I'm also fortunate that the dress code for my job is pretty relaxed working with participants which means most days I wear a comfortable t-shirt and leggings. I don't put as nearly much effort in my appearance than I used to and it's forced me to learn something important: it doesn't matter what I look on the outside, my confidence comes from within. I can feel just as good about myself with my wet hair pulled up in a bun in my yoga leggings as with my hair straightened and wearing a fancy dress. In fact I'm more comfortable with my hair wavy from the shower and in my workout clothes than trying to be something I'm not. There's no way I could ever fit society's mold of the perfect woman with perfect hair and always wearing skin-tight dresses. Not saying it's a bad thing if you do like wearing dresses and skirts, I'm just saying that I don't. My point is that we all have the right to do what makes us feel beautiful without worrying what other people think we look like. If you feel beautiful and like the way you are then then keep doing you, girl!
You don't have to try so hard
You don't have to bend until you break
Last year I was completely and utterly broken. At rock bottom and beginning the long and painful journey to recovery. I had bent myself over and backwards trying to get myself to a weight where I thought I would be happy. But in the end all it did was leave me broken and empty.
Wait a second,
Why should you care, what they think of you
When you're all alone, by yourself, do you like you?
Do you like you?
Like I said, confidence and self-worth don't come from other people. It's a process that has to come from within you. The reason I can feel just as confident with my air dried hair and yoga pants is that I'm more myself. I feel more comfortable in my skin because I follow my own standards rather than what society tells me I should look like. I'm no longer trying to be something I'm not because truth be told, I'm not happy when I force myself to spend so much time trying to perfect my appearance. It doesn't make me any more of a better person or any more beautiful. We are all our most beautiful when we are ourselves, not trying to be something we're not. We don't have to try to be someone else just to fit in, to get validation from others, to wait for society to tell us beautiful. Because we are all beautiful when we're our most natural selves, the person we were created to be.
So that's why I love this song and video. It's sends such a powerful and moving message that I hope it continues to spread and reach those who need it.
You don't have to try so hard
You don't have to change a single thing
https://www.youtube.com/watch?v=GXoZLPSw8U8
Wednesday, July 16, 2014
Grilled Zucchini and Squash
I may have gone overboard with grilling on vacation but everything tastes so much better when it's grilled! It just adds a whole new flavor profile to the food that I can't get enough of it. While on vacation our go-to method of cooking any food was "just throw it on the grill". So that's exactly what we did. Zucchini, squash, chicken, swordfish, steaks, corn, the list goes on.
Today I'm gonna share the zucchini and squash recipe for two very important reasons: 1) it was my favorite and 2) it was the only one I took pictures...oops. Sorry guys but I'm not the type of person that takes a lot of pictures to begin with and since I was on vacation I had zero idea of work on my mind.

.JPG)
.JPG)
Today I'm gonna share the zucchini and squash recipe for two very important reasons: 1) it was my favorite and 2) it was the only one I took pictures...oops. Sorry guys but I'm not the type of person that takes a lot of pictures to begin with and since I was on vacation I had zero idea of work on my mind.
To prepare the zucchini and squash first cut it long ways. I think I got about 3-4 pieces per zucchini/squash. An easy way to cut this would be to have the zucchini flat on the cutting board and then take a plate and cover the zucchini. While you hold down the plate, run your knife through the zucchini to cut it in half. I hate to admit but I did not do it the safer, easy way. I just cut off the ends, stood the zucchini up on one end and ran my knife down the middle to cut it in half and repeated it with each of the halves. I wouldn't recommend doing it this way but my knife was too short and small to do it the smarter way. So I had to risk cutting my fingers off because there was no way I wasn't having grilled zucchini and squash. You also don't have to cut it in so many pieces like I did but halves would work just as well!
I then sprayed them with olive oil spray. Since we were on vacation and didn't have actual olive oil I had to improvise. I would recommend brushing each slice with a bit of real olive oil on both sides. Then season with salt, pepper, and garlic.
Let the grill heat up and then lay the zucchini and squash down. They cook fairly quickly and only need a couple minutes per side. Just keep your eye on them until they're fork tender.
I cut mine up and had it along with grilled chicken and brown rice! Yes, the chicken and rice are under there I just happened to have an enormous serving of the zucchini and squash :)
What's your favorite thing to grill?
Tuesday, July 15, 2014
Vacation Wrap-up! Part 2
Don't worry guys I didn't forget about the most important part of the vacation-- all the yummy food we ate! Amanda and I were really excited because there was a local farmer's market on Tuesday so of course we went over to check it out. The homemade honey immediately caught our eye and the guy was really friendly and gave us all sorts of samples. He had a lemon-infused honey which I thought was really clever because I've never tried it or thought about adding any sort of flavors to honey. It was deeee-licious! We got a jar of it and I can't wait to start using it in my teas and other baking recipes. Since it's been so hot in the summer I haven't been craving tea as much but I'll be excited to get back into the habit after the next couple months.
.JPG)
.JPG)
.JPG)
.JPG)
.JPG)
.JPG)
.JPG)

.JPG)
I was excited that the beans were multi-colored because I've never tried purple ones. It turned out that after we cooked them they turned green and still tasted the same. I was disappointed but quickly got over it because the beans were so fresh and crisp!
We were also very happy that there was a Kohr Brothers near us! I grew up on this stuff since there was one at the boardwalk near our beach house. It reminds me so much of my childhood because we would walk the couple blocks to the boardwalks most nights after dinner and just walk along the boardwalk with our ice cream.
I was pleasantly surprised that it's also relatively guilt-free. There's only 130 calories in a small and it's also low in fat! This was very welcome news and so naturally we went back again later in the week :)
Amanda and I made sure to keep up with our running every morning plus took plenty of walks on the beach so we earned our treats that week!
Wednesday morning we went out to breakfast! Like I said there were some restaurants with dog-friendly seating so we decided to go to the Blue Pig. It was a perfect morning and the area outside the restaurant was beautiful. It's actually part of the Congress Hall building which was an old hotel in the 1800s and then restored about 10 years ago. So it's a functioning hotel once again with a really cute patio restaurant!
I got egg whites with fresh fruit and an english muffin with honey almond butter. We also ordered a side of bacon for the pup since she deserved a breakfast treat too, right?!
Like I said we did tons of grilling and my favorite was the grilled zucchini and squash! I have more pictures and I'll post the recipe soon!
The leftover zucchini and squash also went great on my egg white sandwich that I had for lunch the next day!
And of course, what would vacation be without a little carb indulgence? You can find my recipe for these blueberry pancakes here!
Also I had to share this picture because it makes me laugh! In the evenings we would take my mom and Layla for a walk around so my mom would watch the sunset. Of course Layla and I took some cute pictures and then Amanda wanted one with her, too. You can see whose picture she wanted to be in ;)
Sorry again that these past two posts have been a random string of pictures and information! I definitely lost track of the days on vacation but hey isn't that the best part of being able to relax? I hope all of you are enjoying your summer so far!
Vacation Wrap-up! Part 1
I was away all last week and we had pretty unreliable WiFi so I wasn't able to post much so I'm excited to share it with you guys now! When I was going back through the pictures I realized that one post would probably be too long so I'm breaking it up into 2! I felt incredibly grateful and blessed that we even had the opportunity to go away on a vacation after what the three of us went through last summer. I'm happy to say that my mom was fully able and ready to get away to the beach! We found a dog friendly cottage which was a block away from a dog friendly beach so we loaded up little Layla and the four of us headed to Cape May, New Jersey. It's about a six hour drive from Pittsburgh which was the perfect distance for us.
We actually had a beach house in Rehoboth, Delaware when I was growing up and Cape May is right across the bay, you can actually take a ferry over to it. Still, Cape May was a whole new place for us and it was fun to explore. It's pretty much the cutest little town I've ever seen and we're thinking about going back next year. The people we rented the cottage from were super friendly, dog-lovers, and had plenty of helpful tips of what to see and where to go! It was also a relief to be able to bring Layla along because she's so young and I wouldn't want to have to board her or keep her with family plus I'd miss the little bugger too much! I would've been too stressed out and worried about her so I loved being able to have her with us. There were also some dog-friendly places in town so we took her out to breakfast with us!
So this post is probably going to be a little out of order since I can't remember what we made on which days but we definitely used the grill at the house! We grilled corn, zucchini and squash, chicken, swordfish you name it and it was on the grill. I think my sister finally convinced me that it would be worth it to invest in a new grill since we used it so much on vacation and I missed having one when we got home. I apologize that I won't have many pictures for the recipe as my mind was on vacation mode and I didn't stop to take a lot of pictures before gobbling up my food. Still, I'll try to recap as much as I can!
We got in late Saturday afternoon so me and Amanda went grocery shopping and made a quick dinner before going for a run. We decided to take Layla with us because she had been in the car all day and we would be running on the sand which we figured would be easier on her joints than pavement. I read several articles awhile ago about running with your puppy at too early of an age since the vigorous exercise can interfere with their proper growth and development. She's almost 8 months old now (they recommended around 9-12 months is okay) so I've slowly started taking her for short runs with me once a week. On Saturday with Amanda, we ran 1 mile, walked 1/4 mile, ran 1 mile, and walked 1/4 mile. Usually I don't take walking breaks but I wanted to make sure Layla would do okay which is why we also only ran 2 total. I'm proud and happy to say that she LOVED it. She's a natural born runner and it was amazing at how little I had to train her. She didn't pull, didn't try to stop and sniff anything, didn't get overly excited to see other dogs and people, and stayed right by my side. She was thrilled to be able to just trot alongside us and actually seemed disappointed when we would make her stop to take a walking break, she would keep trying to get going again! I look forward to our Tuesday runs now and she's doing well with the training and directions I give her.
Sorry to get off topic but Layla is such a huge part of my life that I love talking about her! Anyone that knows me knows I'm a huge animal person and especially a dog person. I didn't even realize how much I missed having a dog until we got her so needless to say I'm soaking up every minute I can get with her!
.JPG)
.JPG)
.JPG)

.JPG)

So this post is probably going to be a little out of order since I can't remember what we made on which days but we definitely used the grill at the house! We grilled corn, zucchini and squash, chicken, swordfish you name it and it was on the grill. I think my sister finally convinced me that it would be worth it to invest in a new grill since we used it so much on vacation and I missed having one when we got home. I apologize that I won't have many pictures for the recipe as my mind was on vacation mode and I didn't stop to take a lot of pictures before gobbling up my food. Still, I'll try to recap as much as I can!
We got in late Saturday afternoon so me and Amanda went grocery shopping and made a quick dinner before going for a run. We decided to take Layla with us because she had been in the car all day and we would be running on the sand which we figured would be easier on her joints than pavement. I read several articles awhile ago about running with your puppy at too early of an age since the vigorous exercise can interfere with their proper growth and development. She's almost 8 months old now (they recommended around 9-12 months is okay) so I've slowly started taking her for short runs with me once a week. On Saturday with Amanda, we ran 1 mile, walked 1/4 mile, ran 1 mile, and walked 1/4 mile. Usually I don't take walking breaks but I wanted to make sure Layla would do okay which is why we also only ran 2 total. I'm proud and happy to say that she LOVED it. She's a natural born runner and it was amazing at how little I had to train her. She didn't pull, didn't try to stop and sniff anything, didn't get overly excited to see other dogs and people, and stayed right by my side. She was thrilled to be able to just trot alongside us and actually seemed disappointed when we would make her stop to take a walking break, she would keep trying to get going again! I look forward to our Tuesday runs now and she's doing well with the training and directions I give her.
Sorry to get off topic but Layla is such a huge part of my life that I love talking about her! Anyone that knows me knows I'm a huge animal person and especially a dog person. I didn't even realize how much I missed having a dog until we got her so needless to say I'm soaking up every minute I can get with her!
Just to prove what a goof she is here she is laying on my legs in the car. We have a whole backseat to ourselves and guess where she sat the whole time? Right. on. me. Anyone who was brave enough to sit in the back seat with her (either my sister or me) got bombarded with cuddles!
The reason you can't see my legs is because there's a giant fluffball laying on them...
She's lucky I love her to death!
We had perfect weather all week and the beach wasn't too crowded either which was really nice. We stayed on the bay side since that's the dog-friendly beach so we were able to avoid all the crowded beaches along the main part of town.
.JPG&container=blogger&gadget=a&rewriteMime=image%2F*)
On Sunday we took my mom to see the Cape May lighthouse since she loves anything and everything to do with lighthouses. It was a beautiful day!
I took advantage of her being glued to me in the car to take some selfies :) sorry I'm not sorry!
Read more in Part 2
Subscribe to:
Posts (Atom)