After getting requests, I decided to put this little tutorial together! Warning: I made this cake simply to surprise my sister for her birthday, and it is not supposed to look professionally done or impressive. So if it looks silly to you, well that's how it's supposed to be! Just a homemade cake done out of love!
I decided to make the cake in the shape of a koala since Amanda has been obsessed with them her entire life. I had no idea how it was going to turn out but everyone loved it and thought it was super cute. Amanda's reaction was priceless!
I honestly did not have much of a game plan and was flying by the seat of my pants through this whole thing so this may not seem like the best tutorial, I wasn't really planning on people wanting to know how I made it. The only reason I have pictures is Amanda asked that I take step-by-step photos since she knew I was up to something! Anyway, with my lack of planning it's amazing that the cake made it through the process at all haha! I also realize that koala bears are not naturally pink, but that happens to be Amanda's favorite color. Plus, I thought it'd be even more ridiculous if it was pink!
As I've said before, Amanda has had to go gluten-free for health reasons, so I made this a gluten-free cake. I used this recipe here from Yammie's Gluten Freedom, and it did not disappoint! You can obviously use any cake mix you want for this.

It's hard to tell from this picture but I used two different sized pans. The smaller one (the top pan) was the standard size cake round (9x13), and the larger pan shown on the bottom was a size bigger. I put about 2/3 of the batter in the larger pan since I needed that to be thicker as it was the main part of the cake. The smaller pan I made thinner since that's what you'll be using to cut out the ears. I knew I'd be stacking it on top of each other so it was okay that it would turn out thinner.
This also means you'll have two different cooking times so be careful! The smaller cake will cook faster so make sure you adjust the cooking time to accommodate that so it doesn't burn. I put it in for 15 minutes and then kept checking every couple minutes to make sure the smaller cake was cooking okay. Once it was done I took that one out and waited til the larger one cooked.
I let the cakes cool completely before I started the decorating. I took them out of the pans after 10 minutes of letting them sit, and then they cooled on plates for probably 45-60 minutes. I had other stuff to do but I waited until they were totally cool to the touch. You don't want any of the frosting to melt off the cake!

Okay, so to cut out the ears it was pretty simple! I wasn't all too sure how I was going to cut them out at first (like I said I'm brilliant at pre-planning) but then while wandering around the kitchen, it clicked! I took a standard glass cup from my cupboard and first used the mouth of the cup since it was the wider end. I knew that I wanted to use two stacks of cake for the ears so I needed the bottom to be a bit wider and to taper the top layer to make it more of a mound shape for the ear.

I had just enough cake to cut out two bottoms for the ears and the two top pieces. All I did was hold the glass over the cake, and cut around the glass with a knife. Once I had the two bottoms of the ears cut out, I flipped the glass around and used the bottom of the glass for the top parts of the ears. Since the glass tapers, it was narrower down at the bottom and the perfect size that I needed for the second layer of the ears!
I don't think I mentioned this but I used the smaller of the two cakes to cut out the ears.

Just a quick tip: I kept the cakes on wax paper because I knew that I'd have to move the ears around when I got to the icing part. I figured the wax paper would make my life a lot easier!

All cut out! Like I said, the edges were a little rough on the ears but I knew I'd be shaping them up a bit later when I carved them more. Plus, I would be adding a lot of icing! That covered up a lot of any imperfections.
Another side warning: this was a bit of a messy project. There was tons of icing all over me and crumbs everywhere. Of course, you can take the easy way out like I did and just wipe all the crumbs off the counter so they fall on the floor. The resident clean-up crew (Layla) took care of it for me. I swear I've gotten lazier since having a dog haha!

I used red food coloring to get the pink frosting for the main part of the cake, and then black for the features of the koala. I also needed white for the fluff in the ears but the buttercream icing was already white which saved me some work!

Oh! And in case you were wondering what to do with the scraps left over from the ear cake, make a little trifle! There was leftover cool whip and berries in the fridge from the crepes at lunch so I asked Amanda if she wanted a little treat. So I put this together for her as a surprise!
All I did was cut the cake scraps into little square chunks which I layered in a glass. The bottom layer was cake then cool whip and blackberries then another layer of cake, cool whip, and topped off with more berries! And a small dollop of the icing :) it was the perfect serving for one.

Next, reserve some of the icing in two small bowls. One will be for the black and the other will be left the original white color. You'll make the icing for the main part of the cake in the mixing bowl. To get the light pink color, I used about 5 drops of the red food coloring. I added it in very gradually, drop by drop, because I didn't know how much I'd need. So I added the first drop then mixed it til it was all incorporated and then repeated that with the second, third, etc. drops. It took awhile but I didn't want to accidentally end up with firetruck red icing.


Okay so now for the fun part: decorating! I've seen enough of Food Network to pick up some cake decorating tips so I was happy to put what I've learned to the test! What I did for this cake is I put a giant clump of icing in the middle of the cake, and then spread it out towards the edges. I spread the icing so that it even fell over the edge of the cake and down the side a bit, which is what you want. Then, that made it easier with icing the sides. Otherwise, you can end up with a lot of crumbs coming off and getting in the icing!

I smoothed out the icing on the top of the cake before moving on to the sides. I first just spread out whatever icing was already on the sides before figuring out how much I would need to add. I slowly worked my way around the edges of the cake until it was fully covered! I just used a simple butter knife, nothing fancy. Once I was happy with the smoothness of the main cake, I moved on to the ears!

These took a lot longer to ice than the main part of the cake believe it or not! Like I said, I was winging it so at this point I said to myself "let's put a giant clump of icing on top and see what happens". I figured it could either go a) wonderfully right or b) horribly wrong. Well my gamble paid off! If you have a more thought out method than me please feel free to let me know! I will not be offended in the slightest since this was all new for me haha.
So, all I did was essentially the same method as what I did with icing the koala's head. I took a giant blob of icing, probably the amount the same size as the ear itself. Kinda kidding but not really. It was a heaping amount of icing! I knew that I'd need more to fill in the gap between the top and bottom layers so that it would be a smooth mound. I didn't want anyone to be able to distinguish between the top and bottom layers of the ear but look like a single cohesive piece.

It took a longggg time but I slowly worked my way by pulling the icing down from the giant clump on top of the ear. I smoothed the clump out so that it went slightly flatter and the icing would fall down the sides of the top layer. That was good because then it would sit on top of the bottom layer and fill in the gap. I had to be really, really careful with crumbs since the ears were cut out and there were already crumbs around the edges. But, since I used plenty of icing it covered up any imperfections!

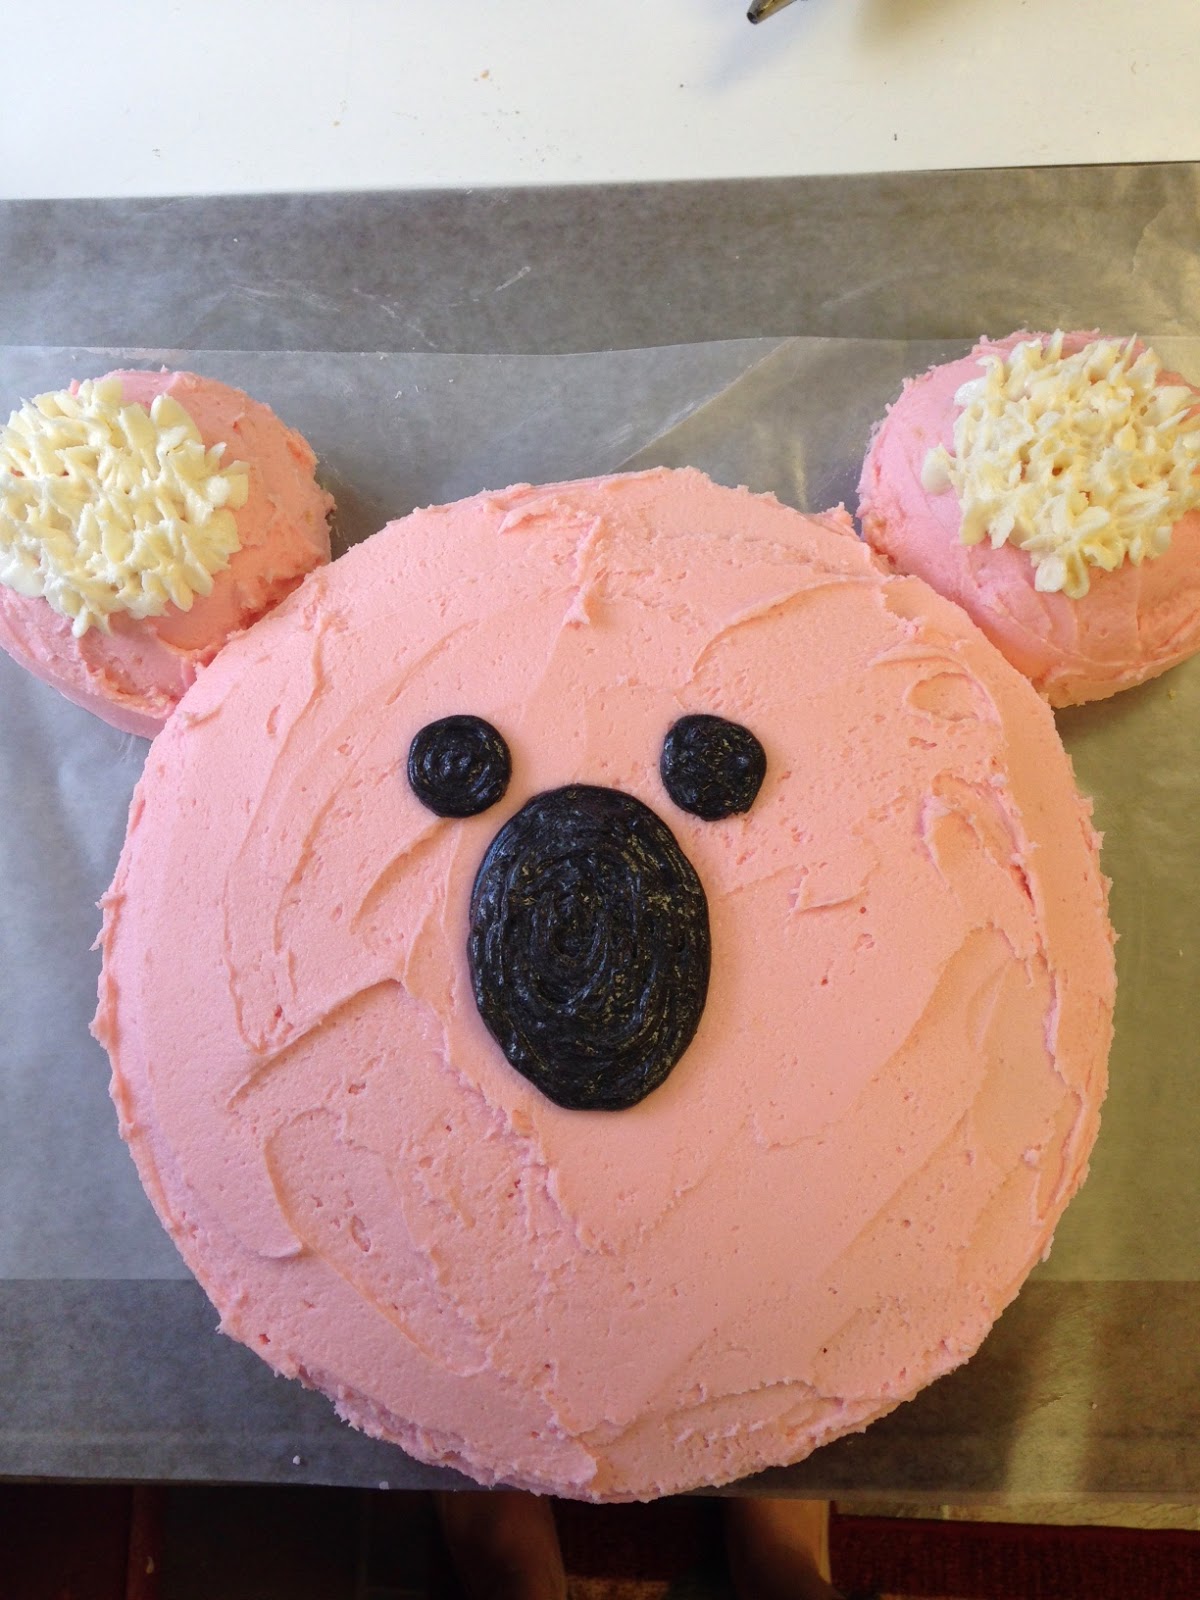
I still didn't have the ears completely in their final position which is why they look kinda weird and the cake looks like a bear-rabbit hybrid at this stage. You can definitely move the ears whenever you want but I decided to allow the icing more time to set by moving on to the face.

So to ice the face, I took the black icing and the white icing and placed each of them in icing bags. If you don't have an icing bag, you can just use a ziploc bag and cut a very tiny piece of one of the corners off. Then you can either insert the piping piece you'll need or just use the hole you created in the corner of the bag. To make the face, I used a regular open tip and a star tip. I was hoping we'd have a different tip than the star one but it made due just fine for this.
First what I did was mark out with a single black dot of the icing where I wanted the two eyes and nose to be. That way I was able to keep myself centered without worrying about one eye being too far to the left or something. After marking the spots, I started with the eyes. Again this would be easier since starting too soon on the nose without figuring out the size of the eyes could throw the proportions off.
I started with one eye and all I did was take the icing and move it slowly in a spiral around the dot a couple times, adding in rings. Then, I'd pause and do the same amount on the other eye to get an idea of what size I wanted them to be. After I was done with the eyes, I took the tip of the icing tube and used it to smooth out the lines so it didn't look like a black spiral for an eye.
I used the exact same method for the nose. Instead of making circular rings, I made them more like ovals since koala's noses aren't perfect circles.
The white fluffiness for the ears is what you'll need the other tip for. Originally, I was hoping for the kind of tip that has multiple of the little narrow openings so that you can create that look of grass that you sometimes see on cakes or cupcakes. Like this one because I'm probably not making any sense by trying to explain it on my own haha!
But we didn't so I made due with the star tip which nevertheless had sort of the effect I was aiming for. I first put the icing around the ears to make it look like the fluffy inside of a koala's ear. Well, since the icing was coming out in more of a star shape, I had to sort of mess it up so it didn't look like a perfect star. I would also put more icing in between spots so that it might be on top of two stars to kind of blend it together in to a more fluffy look. To mess it up, I would just take the icing bag still with the tip and press the tip down in to one of the stars or two, and then pull it back out. That way it created more little strands of fluffy hair. I hope I'm making sense with all of this!

To finish it off, I moved the ears down in their place and then gave him a little smile! I wanted it to be a happy koala :)
It took me a couple hours but it was so worth it to see Amanda's reaction! She absolutely loved it and my family did too. I was nervous how she'd like it or even if she knew what it was so I kept taking pictures and sending it to all my friends frantically asking if they could tell what it was! Fyi they all could tell even without me saying anything which gave me some hope. That's what happens sometimes when you're friends with me-- you randomly get pictures like a pink koala cake asking "what is this???".
I hope that this answers all of your questions and that I was able to fully explain what I did!
No comments:
Post a Comment